

This rustic snowman ornament is super cute and easy to make. It will make a wonderful Christmas tree decoration or even do well as a homemade Christmas gift. I really do love this easy and simple snowman craft and I'm sure you will enjoy this step by step snowman tutorial too!
I always do dream of a white Christmas, however here in the UK we always seem to miss the snow at Christmas time and it tends to arrive in February if the snow does arrive at all.
Enjoy our snowman ornament tutorial. This rustic snowman look will look amazing in the home this year!

Jump to:
💖 Why You'll Love This Craft
- Cozy Farmhouse Vibes: Adds that warm, rustic charm to your tree in seconds.
- Adorable Gift Add-On: Tie one to a present for a handmade touch they’ll love.
- Family Fun Craft Night: Everyone can make their own snow-buddy—messy fun included!
🎨 Supplies Needed
- Wooden slices
- White paint
- Paint brush
- Hessian String
- Twigs
- Tartan ribbon
- Black marker pen
- Glue gun and glue
- Scissors
- Orange glitter paper
🖌️ How To Make a Rustic Snowman Craft

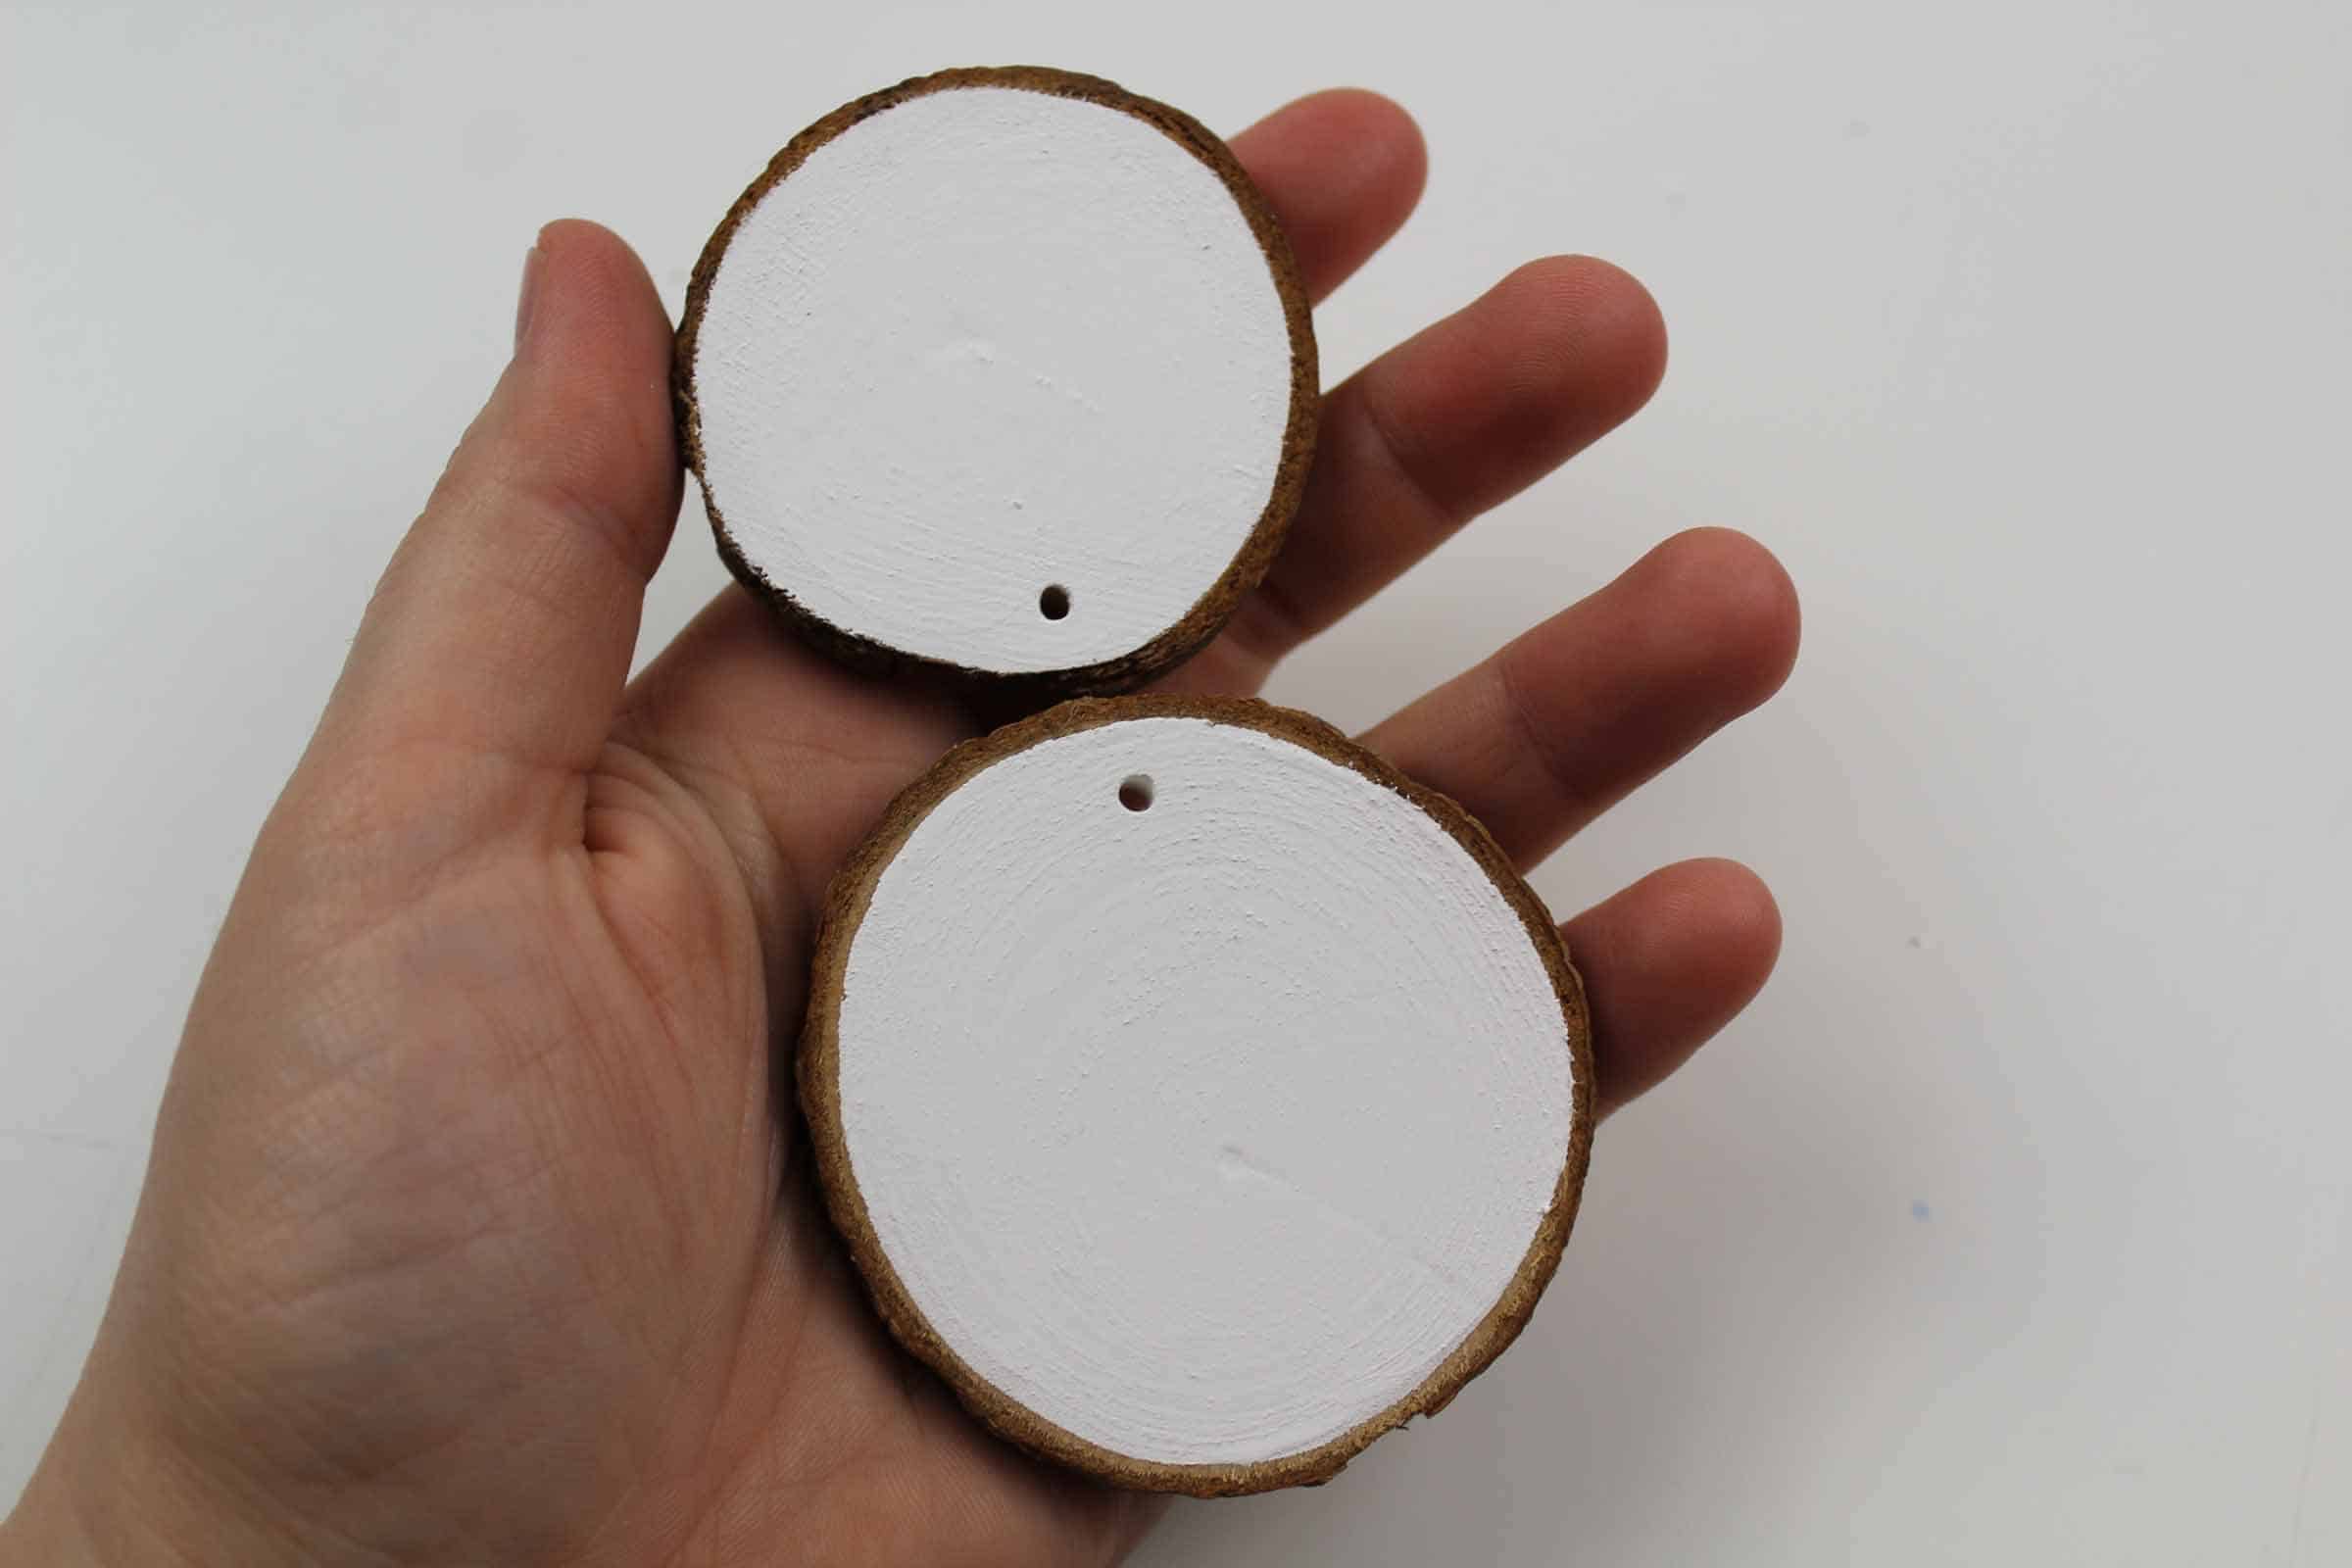
- Step 1: Begin your snowman craft by painting a large and smaller wooden slice. To create a rustic effect, paint the outside of slice white leaving the wooden edge clear.

- Step 2: Once the wooden slices are dry, add two black eyes, cut out and glue a carrot nose and glue to your snowman's face.

- Step 3: Use your glue gun to join the two wooden slices together to form the body of the snowman. Then glue on the twigs for arms and finally add a piece of tartan ribbon as a scarf. Gluing this down is optional. The final step for making this Snowman ornament and Christmas decoration is to glue a hessian string to create a hanger. Then you can hang your snowman ornament to your Christmas tree.
More Snowman Crafts You Will Love!
💡 Pro Tip: Attach a name tag to the snowman's arm and use it as a personalized gift topper that doubles as a keepsake ornament.
🧑🎨 Expert Tips
- Incorporate Vintage Buttons: Use antique or mismatched buttons for the snowman's eyes and torso to add a touch of nostalgic charm.
- Add a Miniature Accessory: Attach a tiny broom or lantern made from toothpicks and paper to give your snowman a unique character.
- Use Twine for Texture: Wrap twine around the snowman's hat or scarf area to introduce a rustic texture and enhance the handmade feel.
- Create a Snowy Base: Mount the snowman on a small wooden disc dusted with faux snow to simulate a wintry scene.
- Incorporate Natural Elements: Use small twigs for arms and a tiny pinecone for a hat to bring in elements from nature.
- Personalize with Initials: Carve or paint the initials of family members onto the snowman's body to make each ornament uniquely theirs.
🖌️ More Christmas Ornaments
Love these crafts! Don't forget to pin them on Pinterest or leave a comment and let us know how you got on!


Did you make this craft? Leave a review and comment below! Alternatively, bookmark it in your browser or save to Pinterest.

Easy Rustic Snowman Ornament
Equipment
- Scissors
- Glue gun
Materials
- Wooden slices
- White paint
- Paint brush
- Hessian String
- Twigs
- Tartan ribbon
- Black marker pen
- glue
- Orange glitter paper
Instructions
- Begin your snowman craft by painting a large and smaller wooden slice. To create a rustic effect, paint the outside of the sliced while leaving the wooden edge clear.
- Once the wooden slices are dry, add two black eyes, cut out, and glue a carrot nose and glue to your snowman’s face.
- Use your glue gun to join the two wooden slices together to form the body of the snowman. Then glue on the twigs for arms and finally add a piece of tartan ribbon as a scarf. Gluing this down is option
- The final step for making this Snowman ornament and Christmas decoration is to glue a hessian string to create a hanger. Then you can hang your snowman ornament to your Christmas tree.
- Enjoy!
More Christmas Themed Crafts


You have some amazing and extremely adorable diy crafts for all ages
The thoughts and sharing of memories from your life is what I thoroughly enjoyed that's how I've taught my kids now adults and now my grandmama' s and boys
I absolutely love your approach and just wanted too share my gratefulness for your awesome crafts
Thank You Thenk You
What are there two small holes in each piece after you paint them?
They were in the slices when we bought them.
What size wood slices did you use? I noticed that your white paint has glitter in it. Did you use paint that came that way, did you add it later or what? What brand of paint?
Hi I added glitter at the end.