

If you are like me, the dog days of summer can make your days a little challenging. The kids are tired of going swimming, not to mention it's too hot for anything and they are bored.
Instead of succumbing to letting them play on their electronics, break out this watercolor Painting for Kids craft!
Jump to:
💖 Why You'll Love This Craft
- Vibrant & Expressive: Kids will love blending bold summer colors like bright blues, sunny yellows, and fresh greens to create their own sunny masterpiece.
- Relaxing & Therapeutic: Watercolor painting is a calming activity that encourages kids to unwind while exploring color mixing and brush techniques.
- Great for Displaying: Once dry, these vibrant watercolor paintings make beautiful wall art or a perfect gift for family members!
🎨 Supplies Needed For This Watercolor Art Project

- Paper
- Glue
- Scissors
- Watercolor Paper
- Watercolor Paint
- Paint Brush
- Salt
🖌️ How to Make this Watercolor Painting for Kids
With this summer fun activity, you can make it with or without paint. Below are instructions for making the craft without the watercolor background and with the watercolor background.
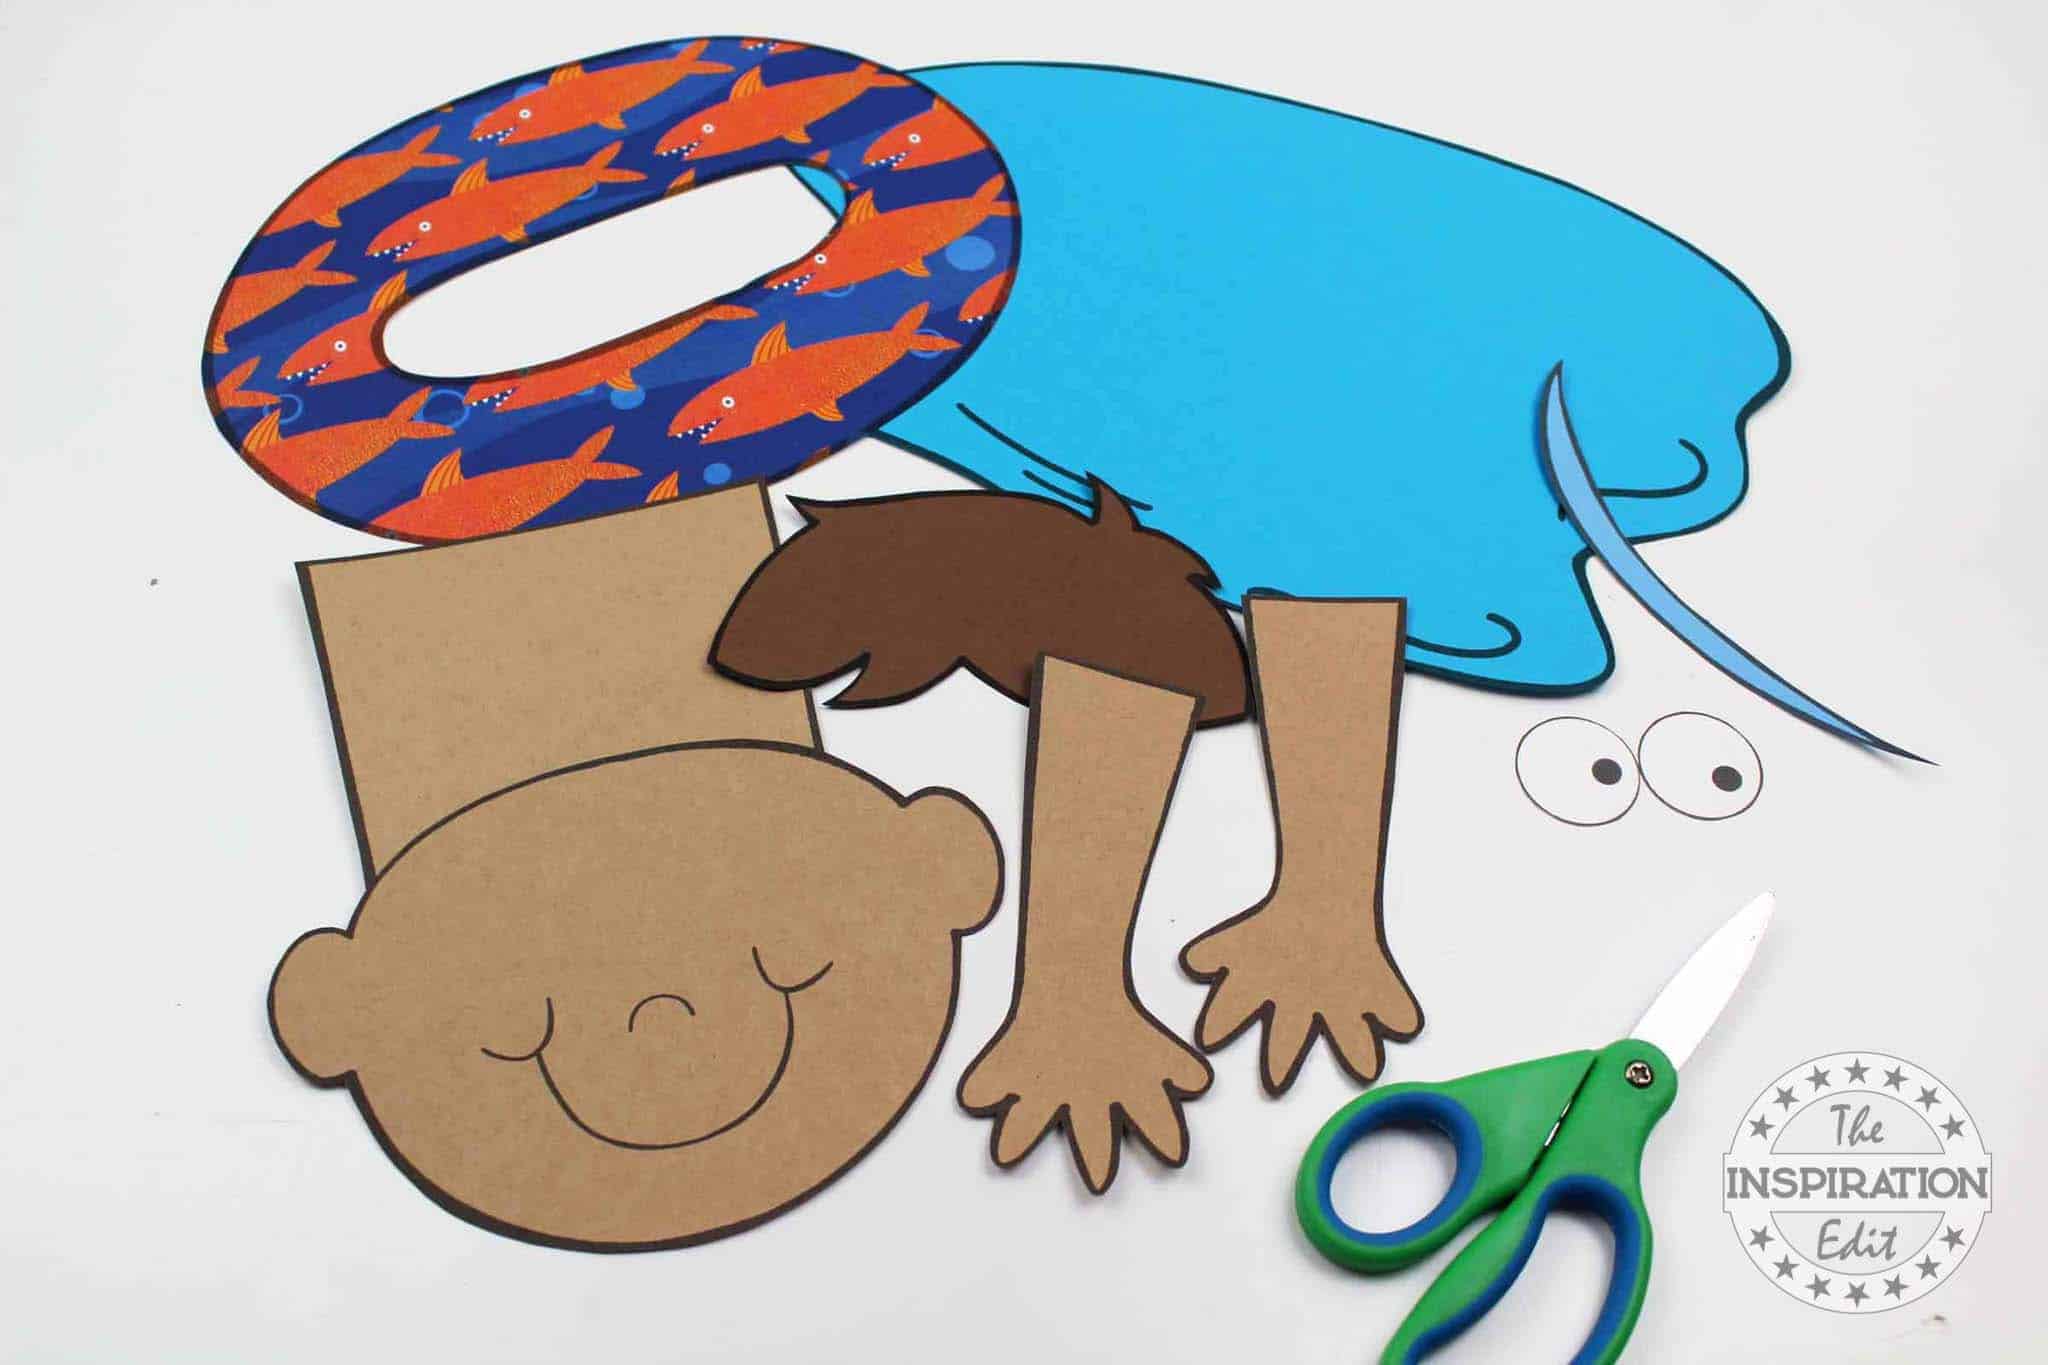
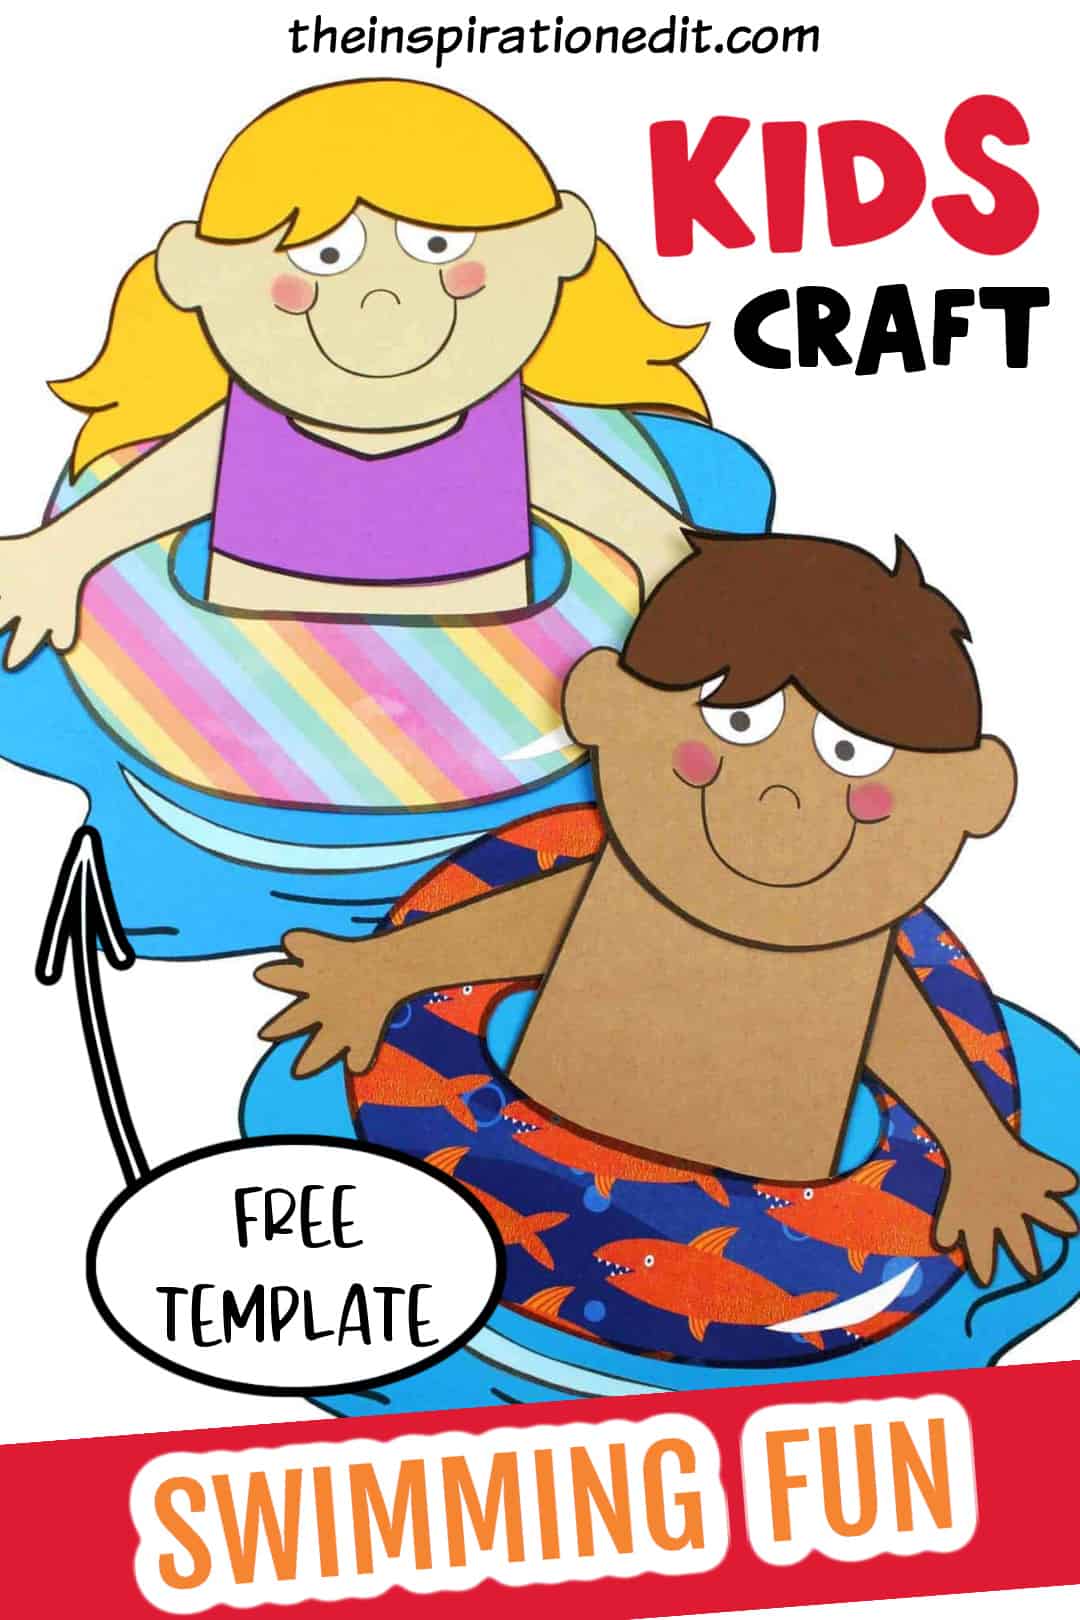
- Step 1: Download and print out the girl and boy in a tube template. Cut out and set aside.

- Step 2: Glue the pieces together using a glue stick or white school glue.

- Step 3: Cut small bits of white paper and add to the edges to create “shine” and give it more life. Your tube kid is done unless you would like to create the watercolor background. You could also glue this tube kid To construction paper.
🖌️ Instructions for Watercolor Background:

- Step 1: Prepare a surface with newspaper or a vinyl tablecloth for easy cleanup.
- Step 2: Set up watercolor paints in shades of blue that you’d like to use.
- Step 3: Mix in some green and yellow for even more color.
- Step 4: Coat your paper in water until it’s damp but not soaked.
Use a paintbrush for this step.
Add watercolor paint and cover the paper.
- Step 5: Mix in some various shades of blue until you’re happy with how it looks.
- Step 6: Sprinkle a few pinches of salt across the wet paint. It’s important that you do this while the paint is wet, other wise it will not work. The salt will create the paint to separate and cause an explosive looking effect.
- Step 7: Allow the paper to dry completely. This will take a while since it was so wet.
- Step 8: Once dry, glue the bubbles and tube kid onto the paper
- Step 9: These would make wonderful bulletin board crafts. Print the tube kid in colors representing your students/children for a really fun and personalized look!


💡 Pro Tip: Placing the Venus dial beside a 24-hour Earth clock highlights speed contrast instantly. Side-by-side spinners anchor the idea that planetary rotation rates vary dramatically.
🧑🎨 Expert Tips
- Water Ratio: Explain the consistencies of light wash, mid-tone, and thick detail. Instruct the kids to load their brushes to ensure vibrant strokes that dry without puddles or chalkiness.
- Brush Loading: Dip only the lower third of bristles, wiping excess on palette edge; this prevents drips and lets children steer clean lines instead of battling uncontrolled watery blooms.
- Stroke Pressure: Use light strokes for skies and firmer pressure for land shapes to show kids how slight changes in hand weight affect edge sharpness and pigment density.
- Edge Patience: Allow one area to dry before touching adjacent sections to prevent color bleeding and build confidence in layering crisp shapes.
- Paper Tilt: Suggest propping one side on a coin stack, guiding water flow downward for graded backgrounds while reinforcing gravity’s artistic role without leaning whole sheets by hand.
- Rinse Rhythm: Establish a rinse-blot-reload habit every color change, using scrap towel dabs to keep hues clean and maintain brush tips sharp across the entire session.
🖌️ More Art Activities For Kids

Did you make this craft? Leave a review and comment below! Alternatively, bookmark it in your browser or save to Pinterest.
Download Template
Grab your free Printable Watercolor Summer Crafts Painting Template here!


Watercolor Painting for Kids: Summer Fun
Equipment
- Scissors
Materials
- Paper
- Glue
- Watercolor Paper
- Watercolor Paint
- Paint Brush
- Salt
Instructions
- Download and print out the tube template. Cut out and set aside.
- Glue the pieces together using a glue stick or white school glue.
- Cut small bits of white paper and add to the edges to create “shine” and give it more life.
- Your tube kid is done unless you would like to create a watercolor background. You could also glue this tube kid To construction paper.
- INSTRUCTIONS FOR WATERCOLOR BACKGROUND:Prepare a surface with newspaper or a vinyl tablecloth for easy cleanup.
- Set up watercolor paints in shades of blue that you’d like to use.
- Mix in some green and yellow for even more color.
- Coat your paper in water until it’s damp but not soaked. Use a paintbrush for this step. Add watercolor paint and cover the paper.
- Mix in some various shades of blue until you’re happy with how it looks.
- Sprinkle a few pinches of salt across the wet paint. It’s important that you do this while the paint is wet, otherwise, it will not work. The salt will create the paint to separate and cause an explosive looking effect.
- Allow the paper to dry completely. This will take a while since it was so wet.
- Once dry, glue the bubbles and tube kid onto the paper.
MORE CRAFTS YOU MIGHT LIKE:

Leave a Reply