

Father's Day is soon approaching and today I am sharing this fantastic black glue father's day craft idea which is super cute, fun, and easy to make with little ones. I really do hope you love this craft and that it will be a great idea for you to try out. Enjoy!

If you're on the lookout for fun father's day cards check out this Father's Day Craft here!
Jump to:
💖 Why You'll Love This Craft
- Unique Art Technique: The use of black glue adds a cool and creative twist to traditional crafting, making the artwork pop with its striking, glossy lines.
- Personalized Gifts: Kids can make personalized designs for their dads, like handprints, hearts, or messages, turning the craft into a heartfelt keepsake.
- Easy Yet Meaningful: While simple to create, the craft delivers a meaningful and thoughtful gift, perfect for Father’s Day, without requiring too many materials.
🖌️ How To How to Make This Fathers Day Tie Craft
- Step 1: Open the top of a half empty bottle of glue.

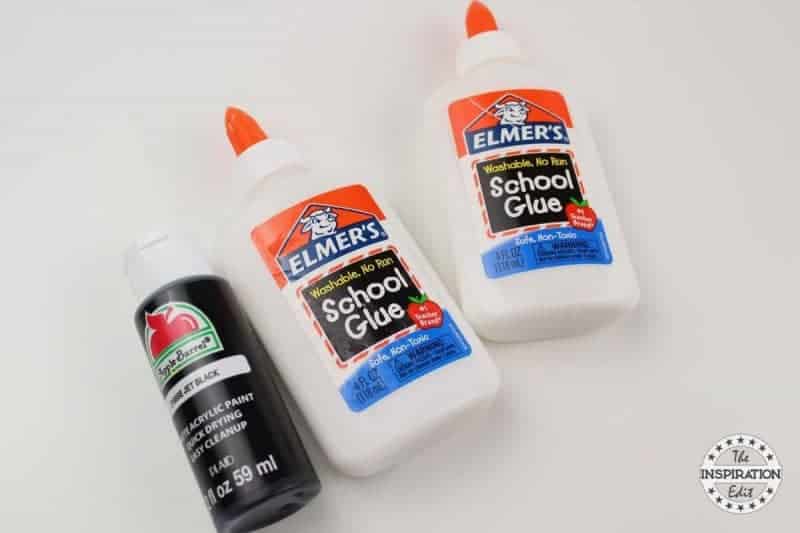
- Step 2: Squirt a good amount of black paint into the bottle. The glue will look a dark cloudy grey.

- Step 3: Put the lid back on and shake well. If the glue is not shaking together, squeeze into a cup, mix and use a funnel to pour the black glue back into the bottle.
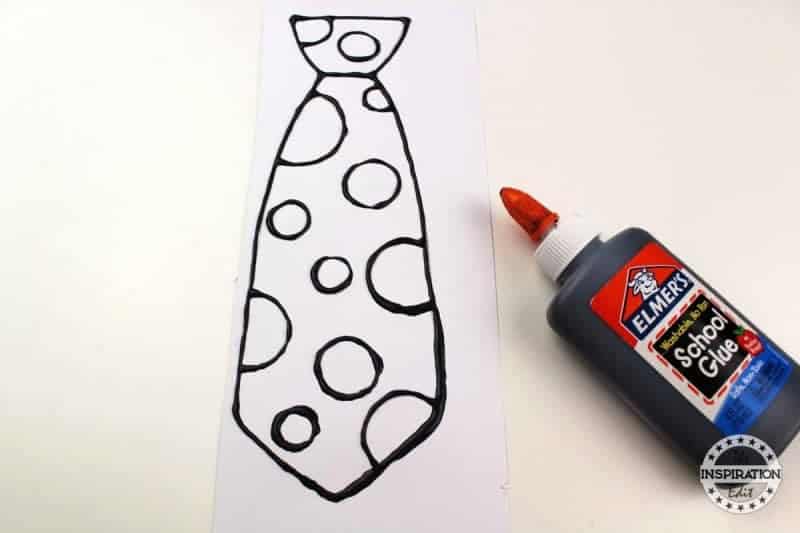
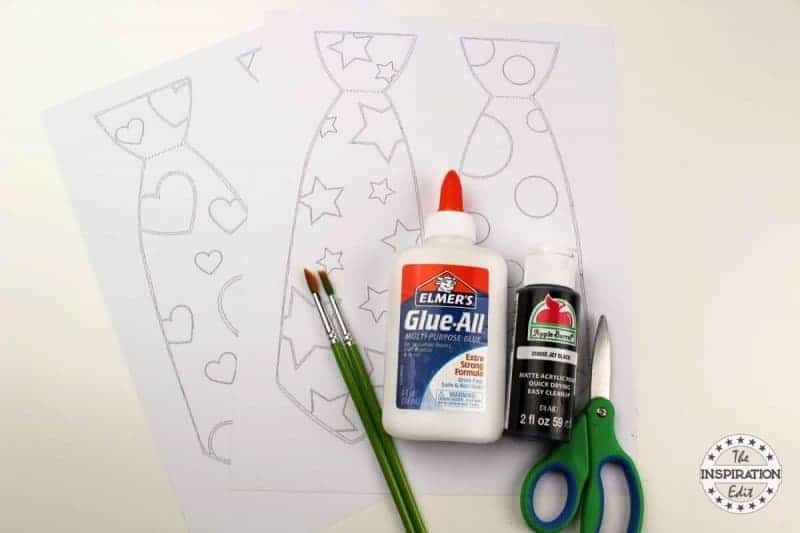
- Step 4: Download and print out the necktie template.

- Step 5: Trace the template with black glue.
- Step 6: Allow the glue to dry completely. Place in the sun or allow it to dry overnight.

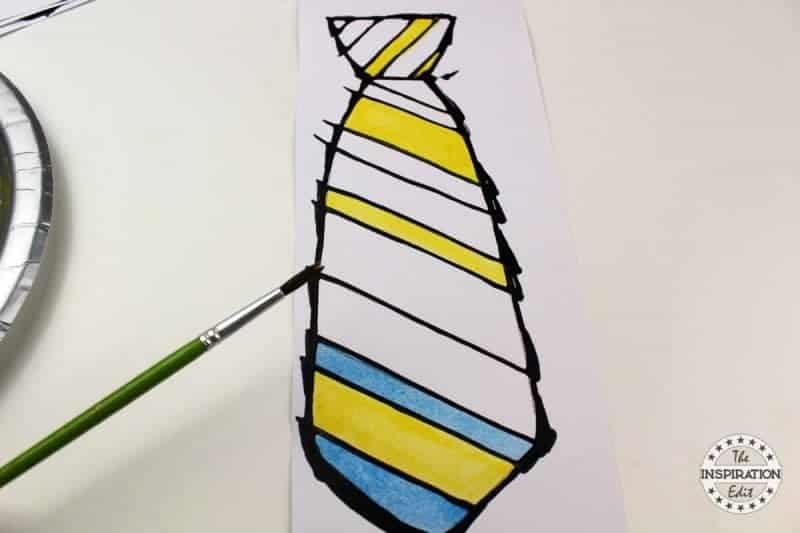
- Step 7: Use watercolours to paint the neckties. The black glue will keep the colours from bleeding into other areas.

- Step 8: Allow the paint to dry completely.

- Step 9: Cut the neckties out. Your necktie craft is finished.


This would make a fun classroom craft. How cute would these be to send home as a keepsake gift?

🖌️ More Parent’s Day Crafts


Did you make this craft? Leave a review and comment below! Alternatively, bookmark it in your browser or save to Pinterest.
Get Your Fathers Day Template Here!
Download Template
Get your free Printable Ties Template here!

Black Glue Fathers Day Craft Idea For Kids
This is a tutorial on how to make a black glue fathers day craft.
Calories:
Equipment
- Scissors
Materials
- Cardstock
- Glue
- Paint Brush
- Black Paint
- Watercolor
Instructions
- Open the top of a half empty bottle of glue.
- Squirt a good amount of black paint into the bottle. The glue will look a dark cloudy grey.
- Put the lid back on and shake well. If the glue is not shaking together, squeeze into a cup, mix and use a funnel to pour the black glue back into the bottle.
- Download and print out the necktie template.
- Trace the template with black glue.
- Allow the glue to dry completely. Place in the sun or allow it to dry overnight.
- Use watercolors to paint. The black glue will keep the colours from bleeding into other areas.
- Allow the paint to dry completely.
- Your necktie craft is finished.


Very good article! We are linking to this great content on our website.
Keep up the great writing.
I look forward to trying this
wonderful idea! i have been looking for an easy craft for my pre-k 3 kids to do for our donuts with dad event. Anyway, are you selling the template? I cant seem to find the link to download. Thank you!
Hi, here is the pdf https://www.theinspirationedit.com/wp-content/uploads/2018/06/ties.pdf