

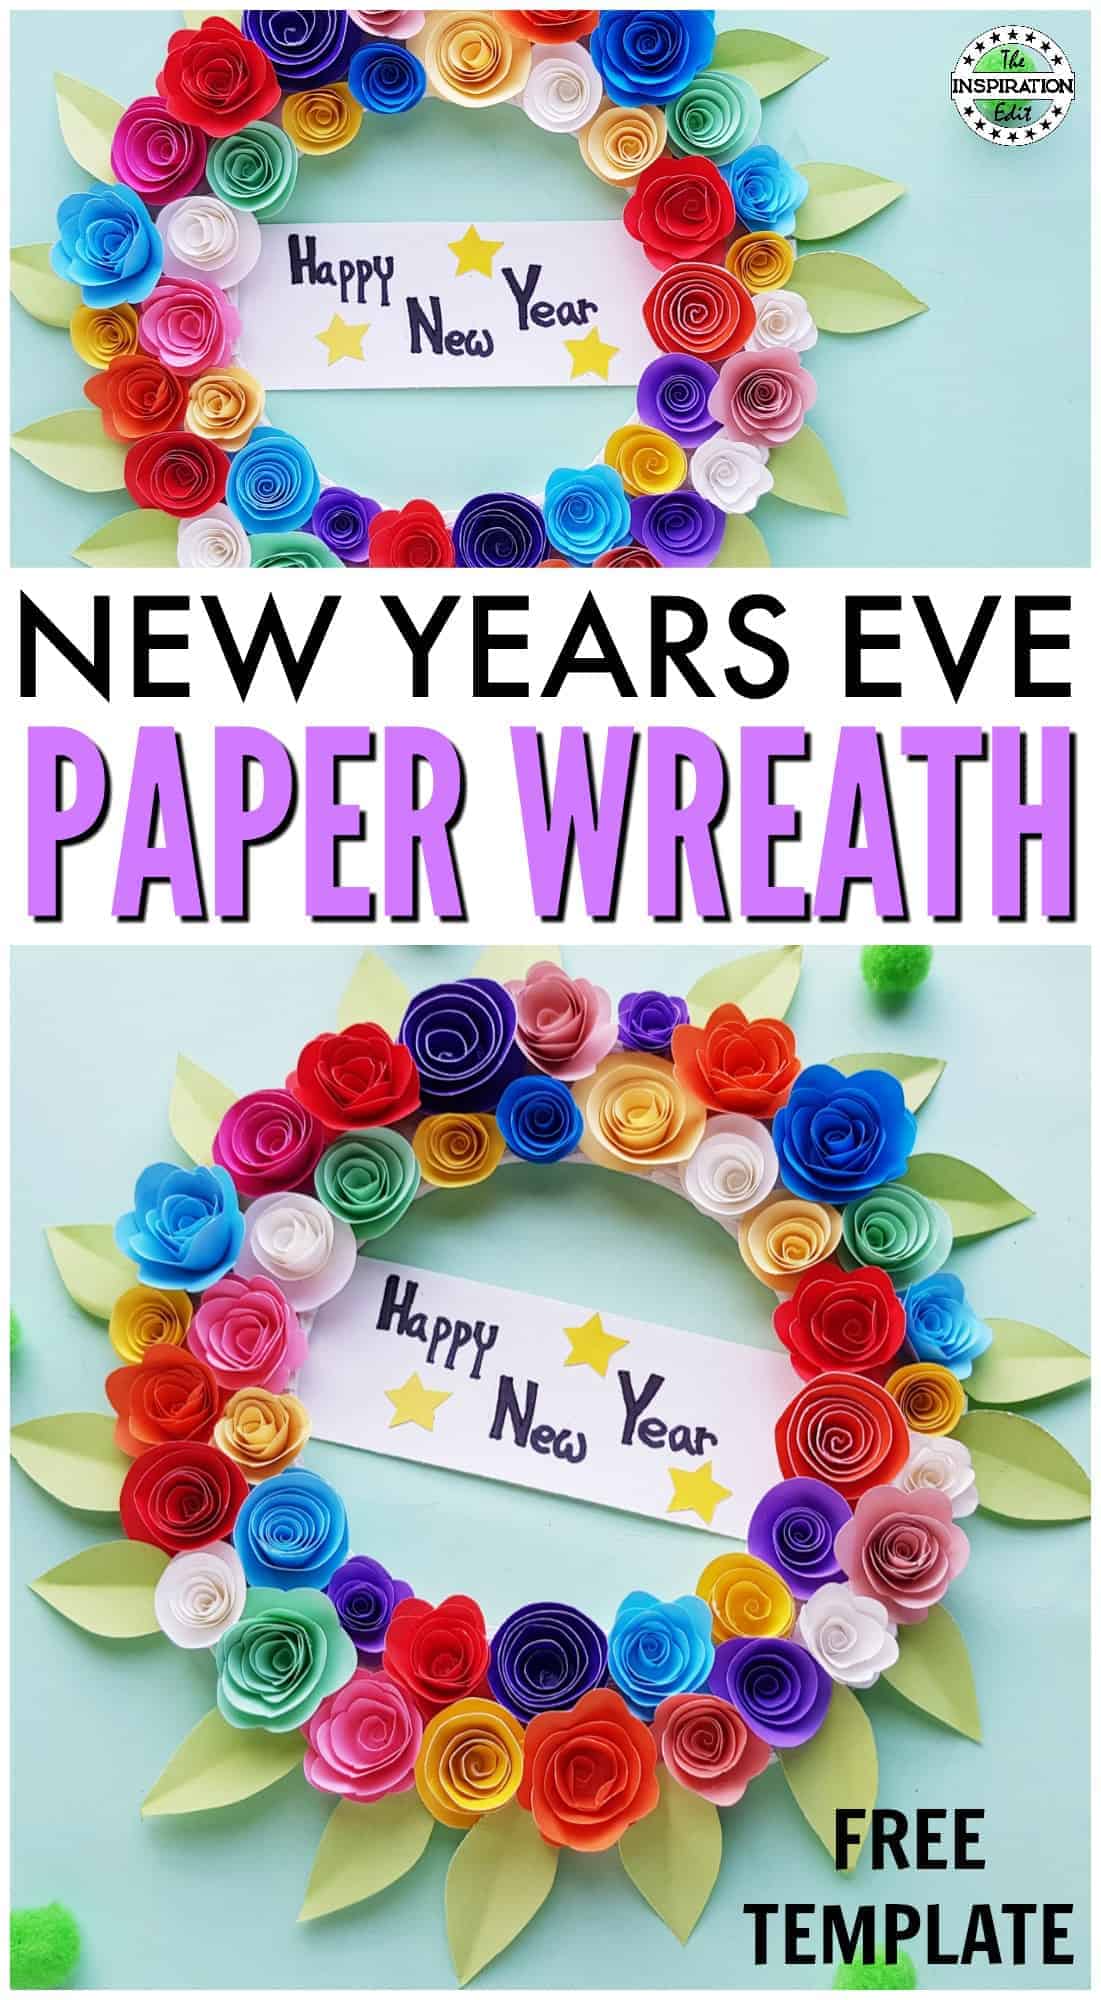
If you're looking for a fantastic New Years craft idea then you may just love this fun and easy to make new years wreath craft.
New Year is a time for celebrating, for fun, reflection, and goal setting. You can get the kids involved in your New year celebrations with this easy floral New Years' wreath. It's pretty simple to make and comes with a free printable template.
Jump to:
💖 Why You'll Love This Craft
- Festive and Fun: Kick off the new year with a cheerful, handmade wreath that adds a pop of celebration to your door or home.
- Simple and Quick: This craft requires minimal materials and can be done in no time, making it perfect for last-minute decorators.
- Kid-Friendly: With easy steps and fun materials, it’s a craft that kids can join in on, making it a family-friendly activity.

RELATED POST: AUTUMN WREATH CRAFT FOR KIDS
🖌️ How to Make a New Years Flower Wreath
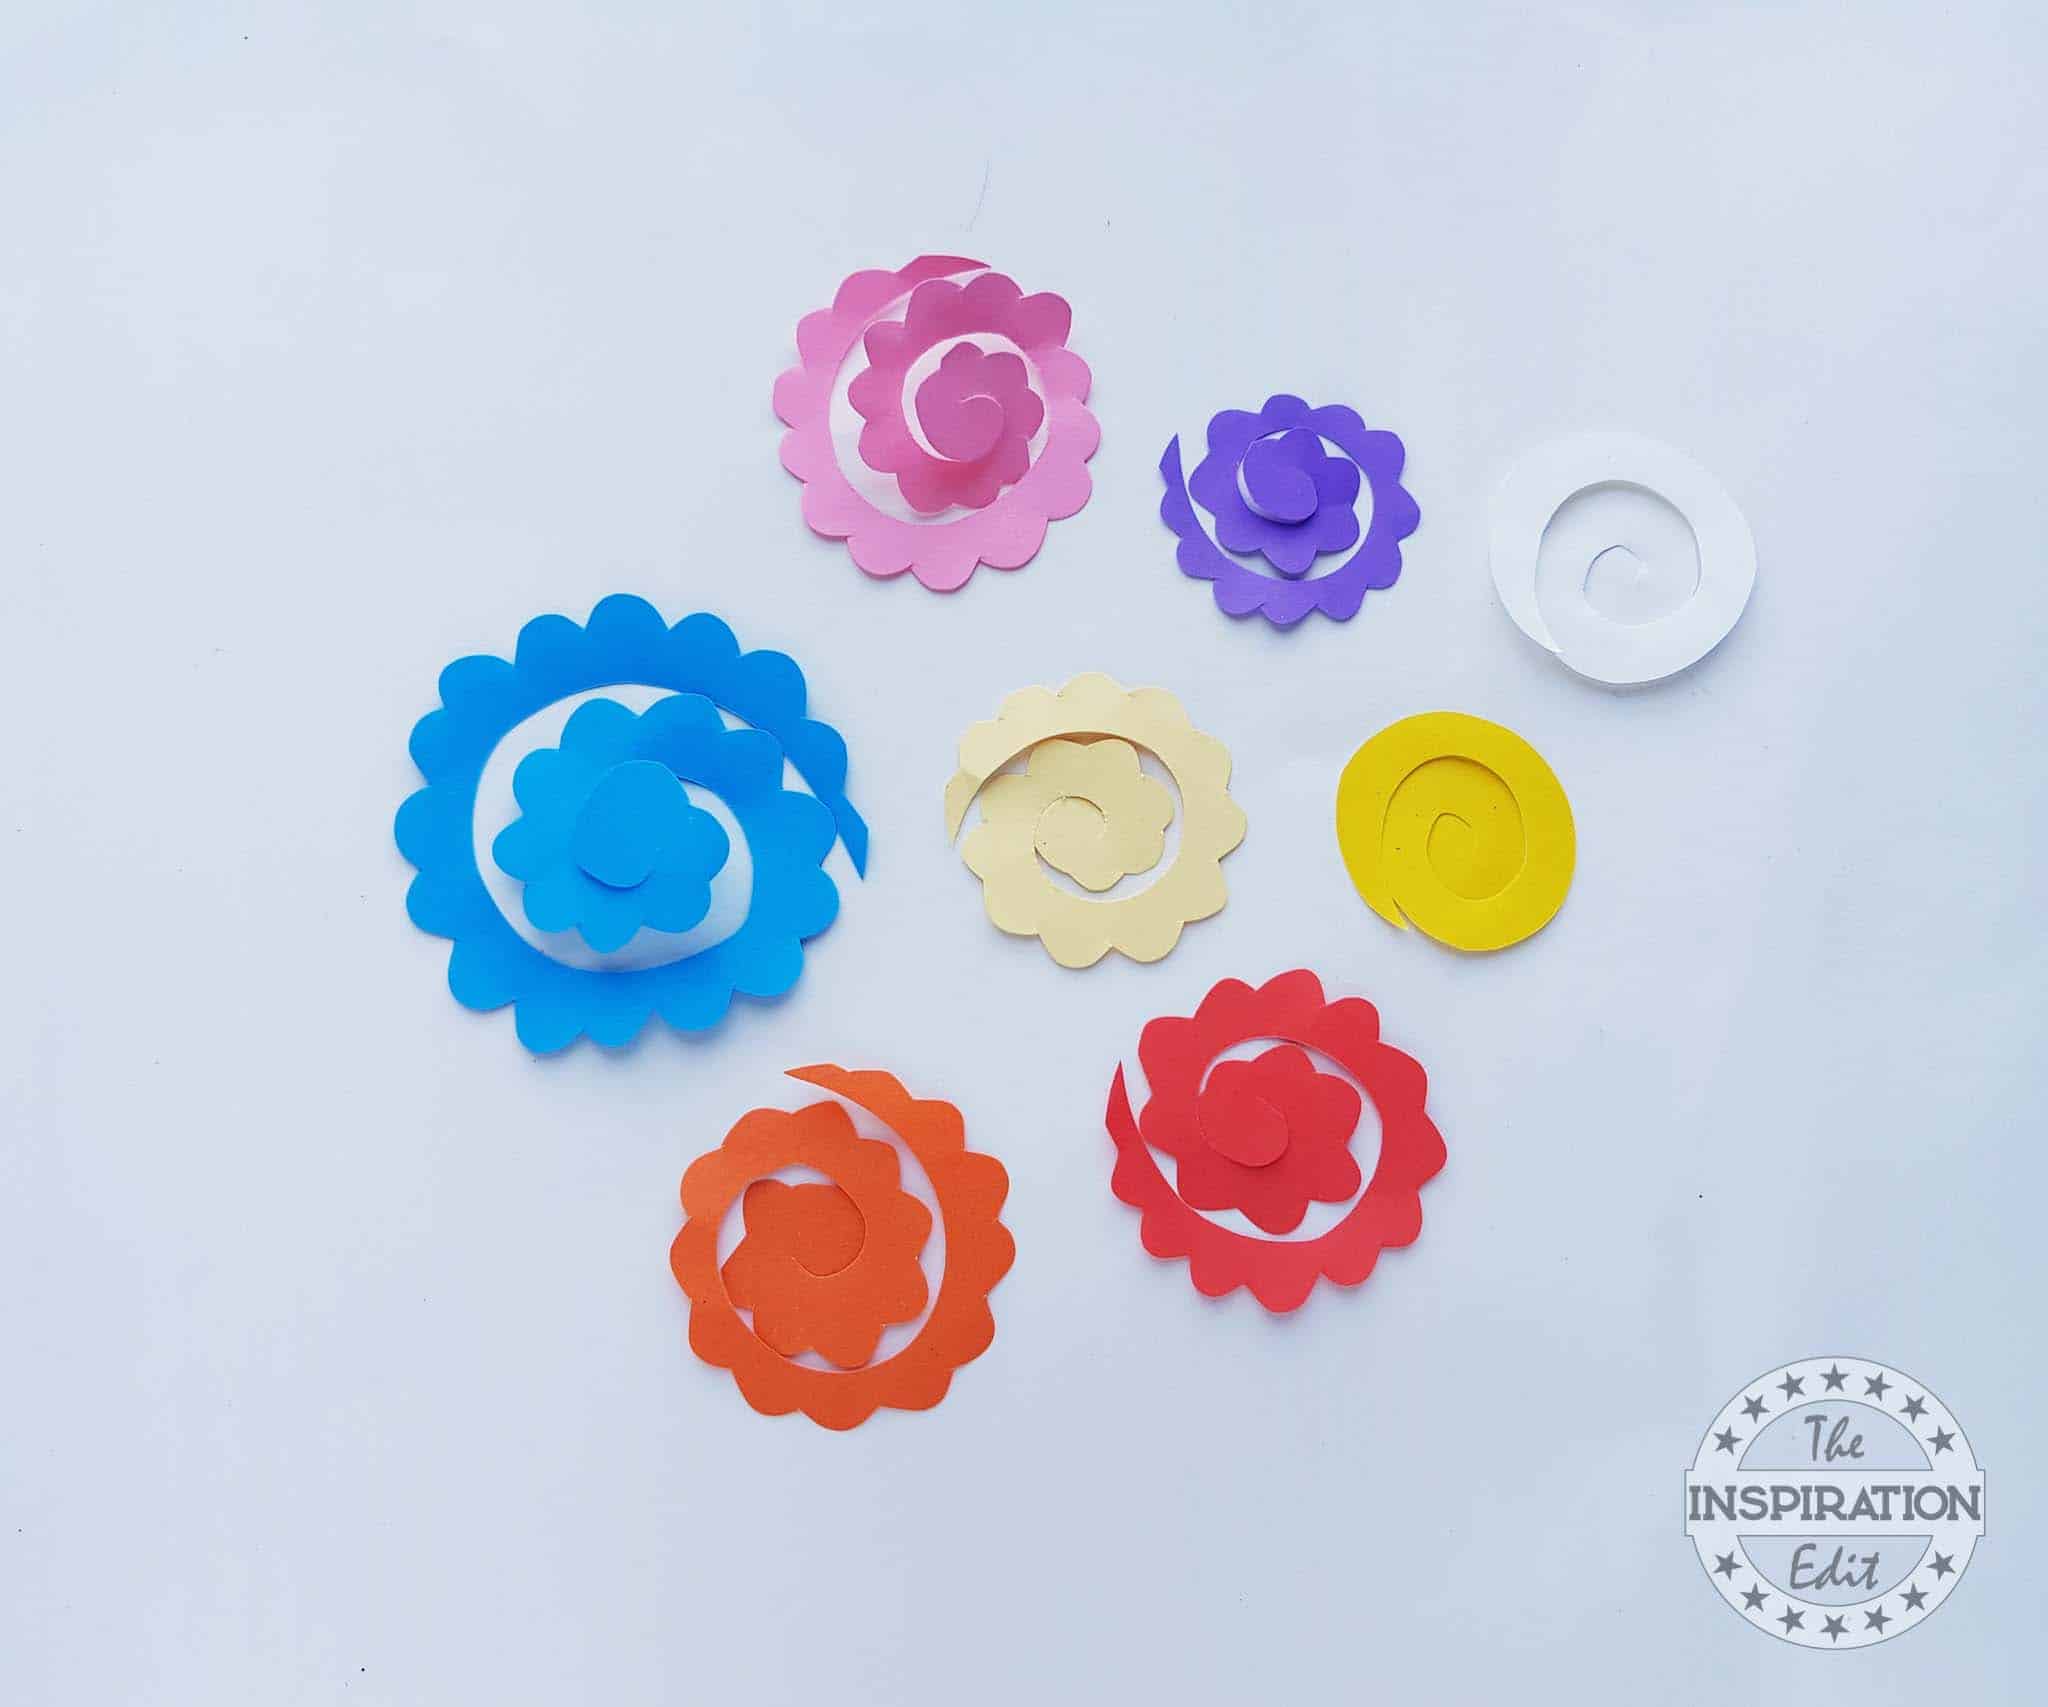
- Step 1: Grab all the colored craft papers you have, this is a great craft project to use all the scrap papers. Trace the spiral patterns from the provided template on the selected papers. Cut out the traced patterns neatly.

- Step 2: Take any one of the spiral cutouts and start to roll it from its outer edge. Keep the coil nice and firm. Continue to roll the spiral pattern towards the center.

- Step 3: Once the coiled pattern reaches the center of the spiral, allow the coiled part to loosen up a little. Glue the coiled part with the center of the spiral.
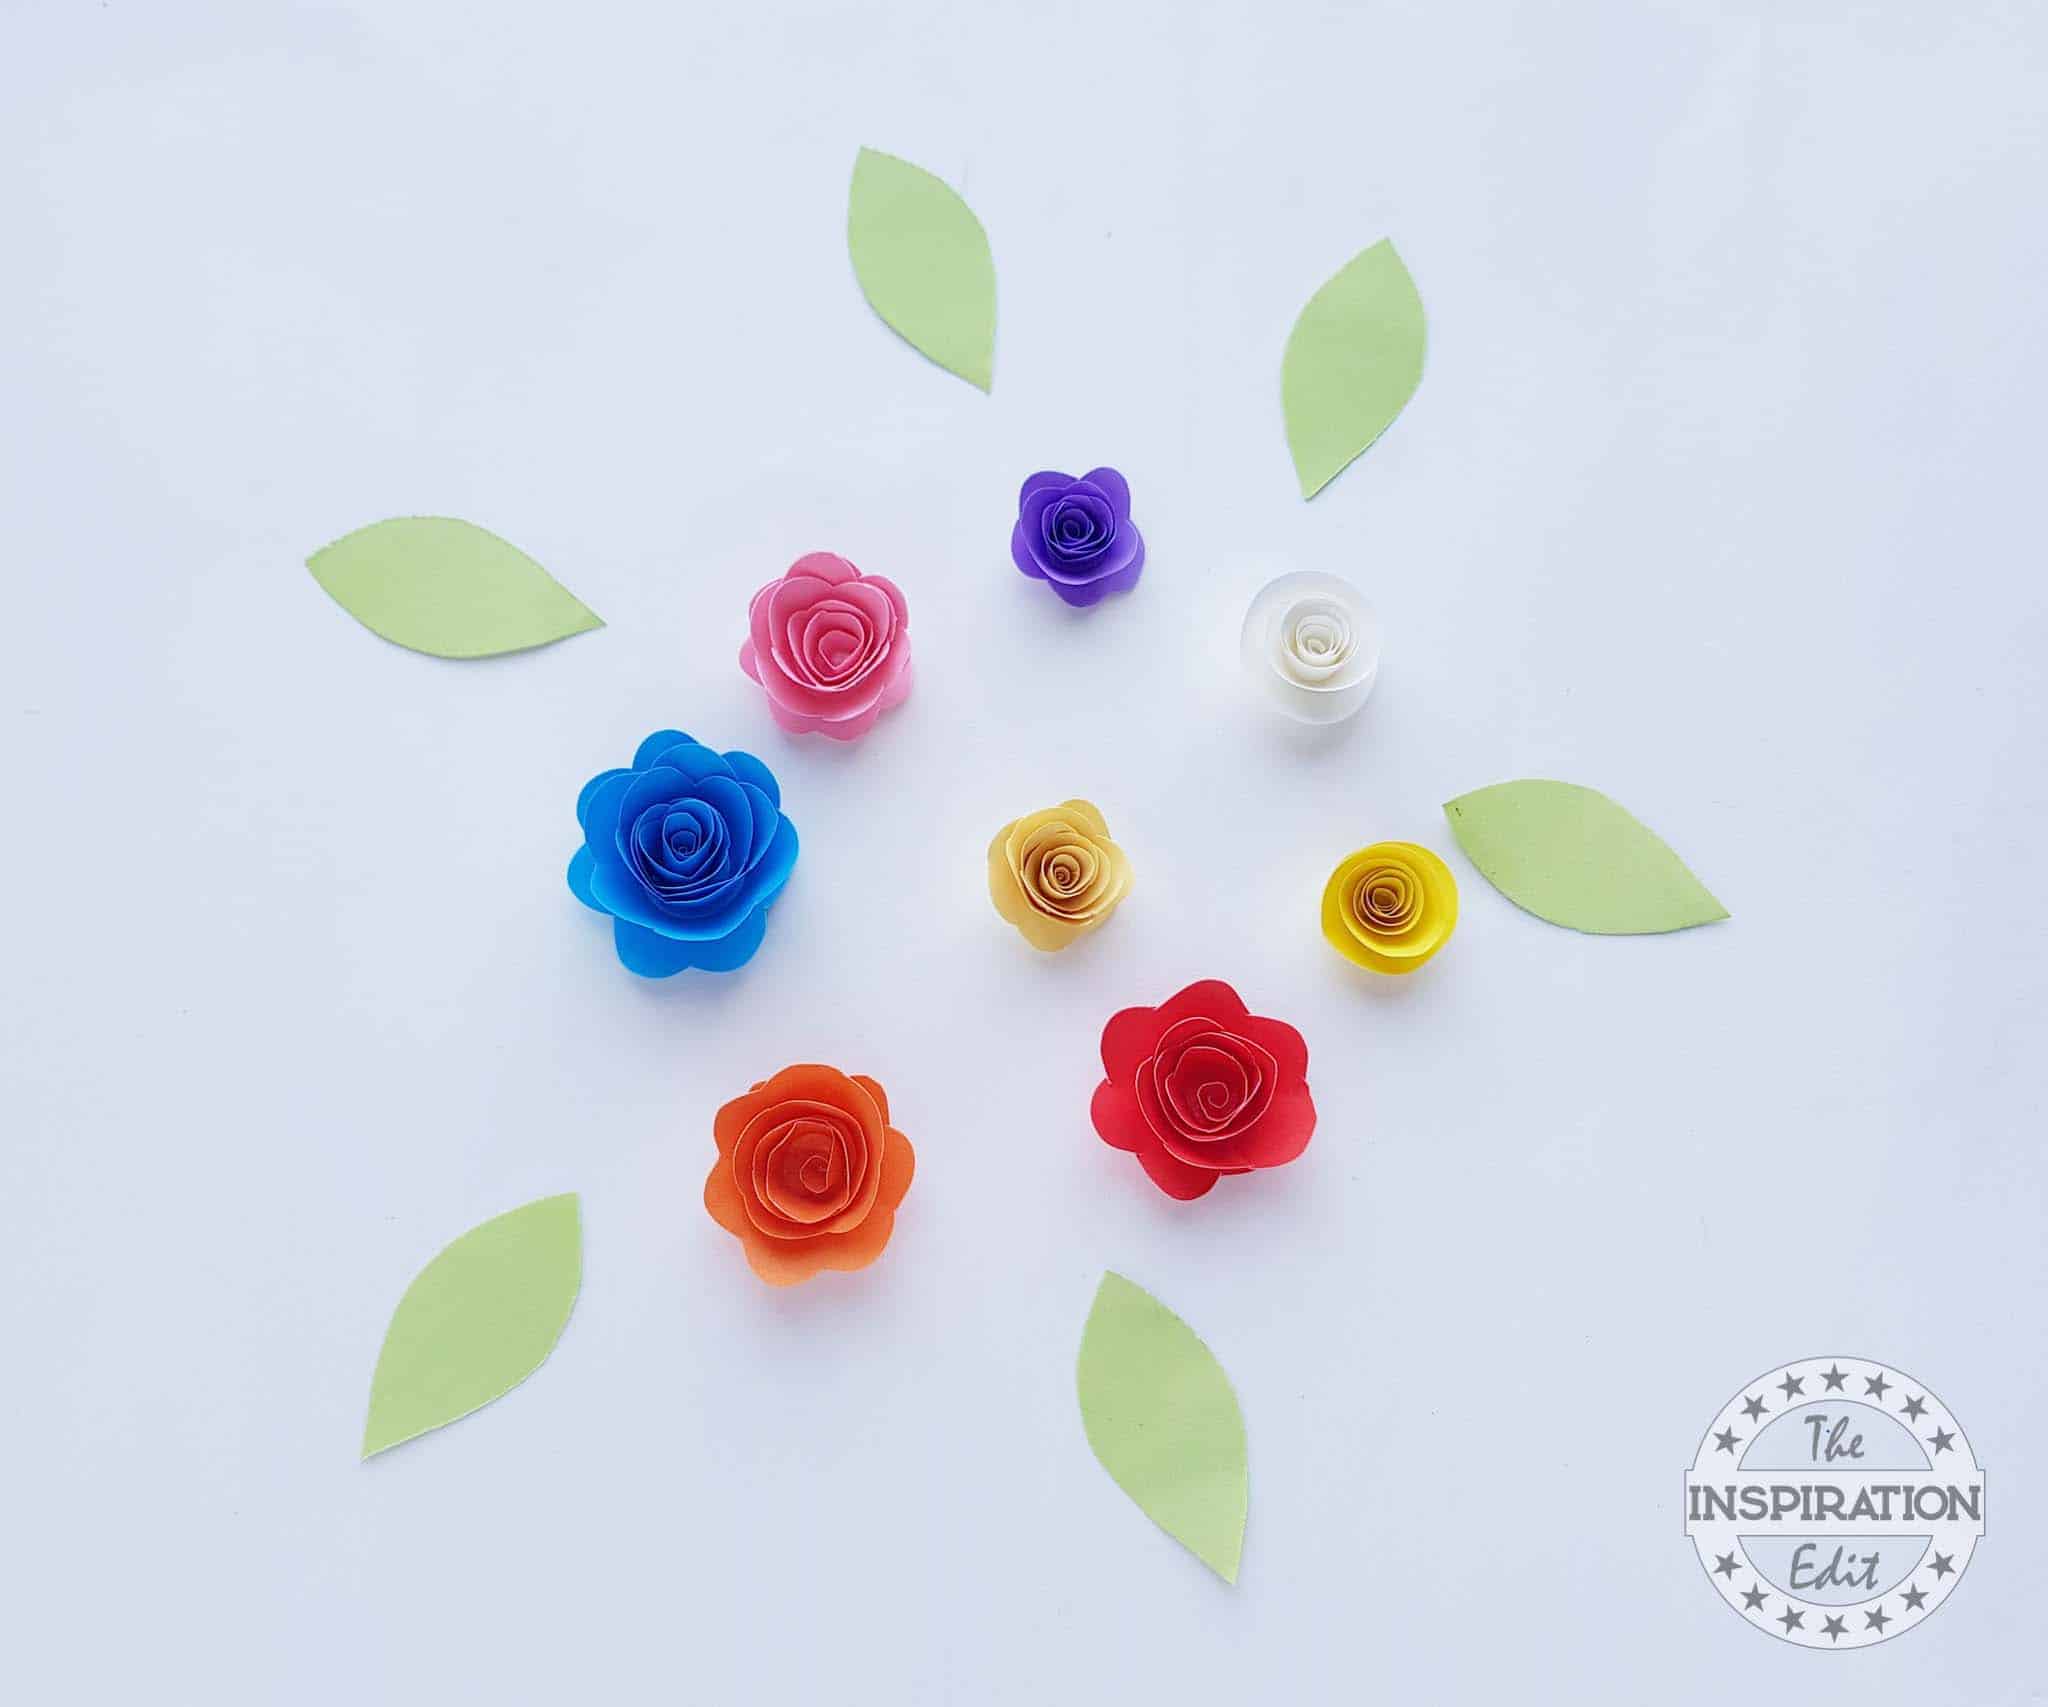
- Step 4: One by one coil the rest of the spiral cutouts and create the coiled flowers. Make enough paper flowers to fill the whole wreath base. Also cut out some leaf patterns from green colored craft papers.

- Step 5: Grab the wreath base. You can cover the wreath base using paper strips or you can keep it as it is. Either way works as the base will be covered with paper flowers.
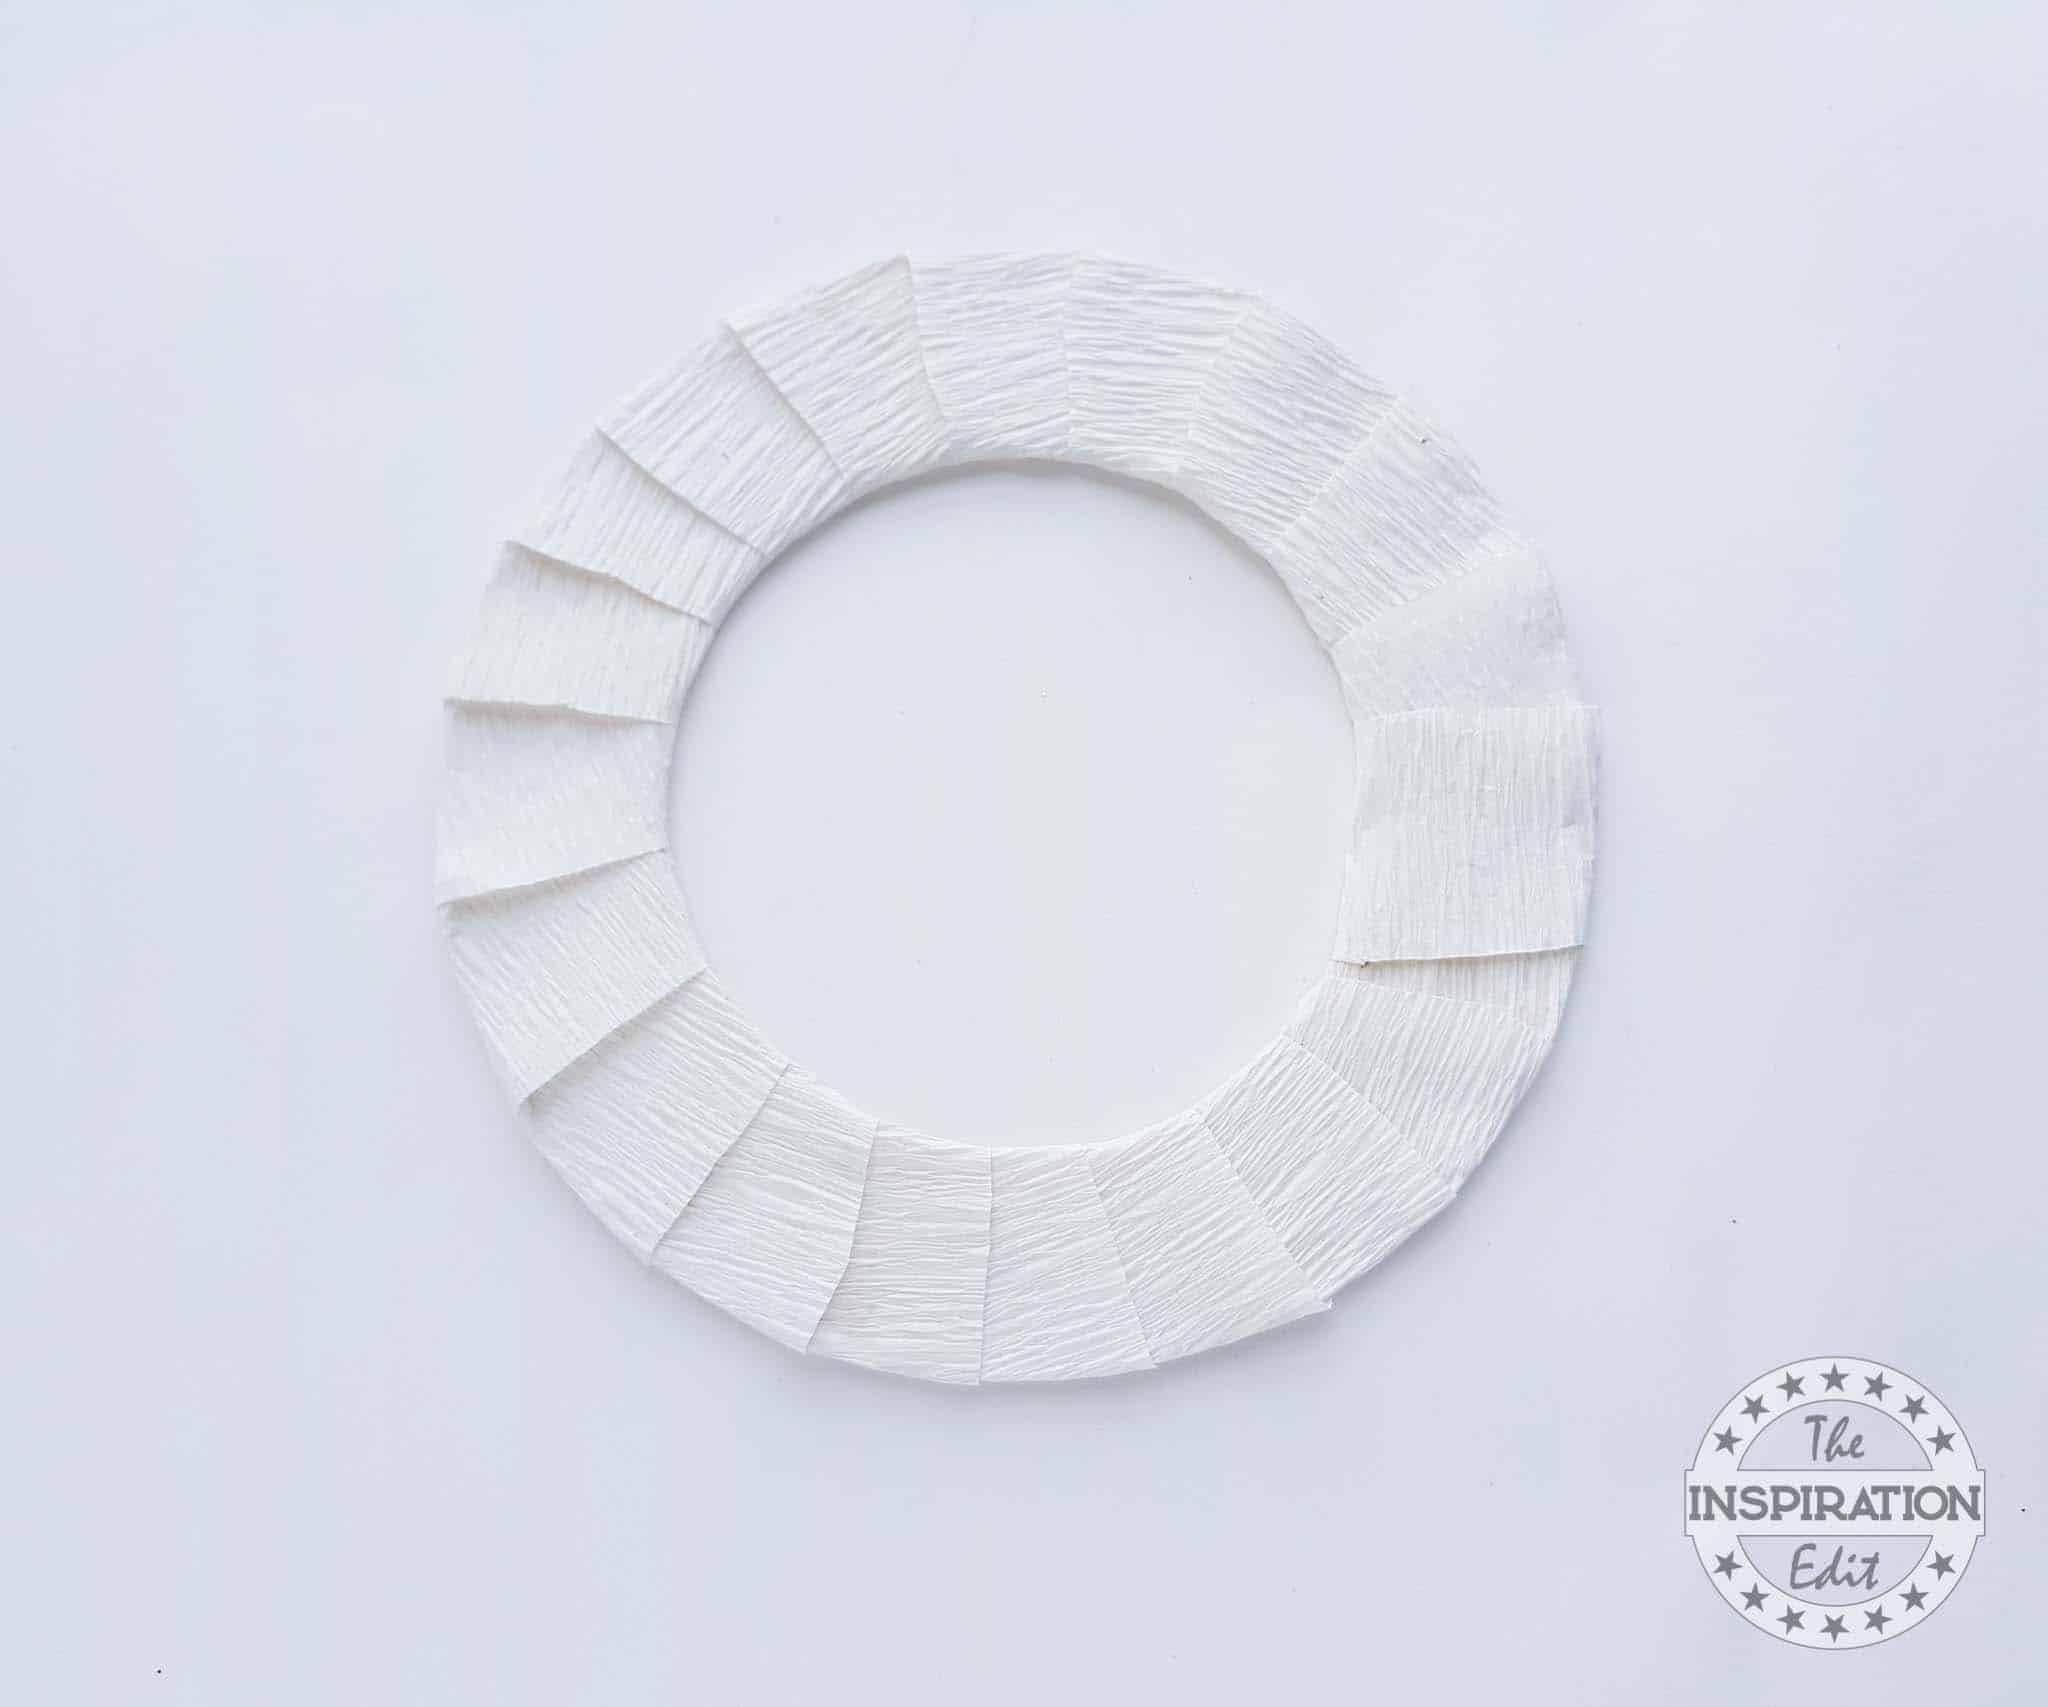
- Step 6: I’ve used a long strip of white crepe paper to cover the whole base.

- Step 7: Done preparing the wreath base? Grab all the paper flowers and let’s get crafty!
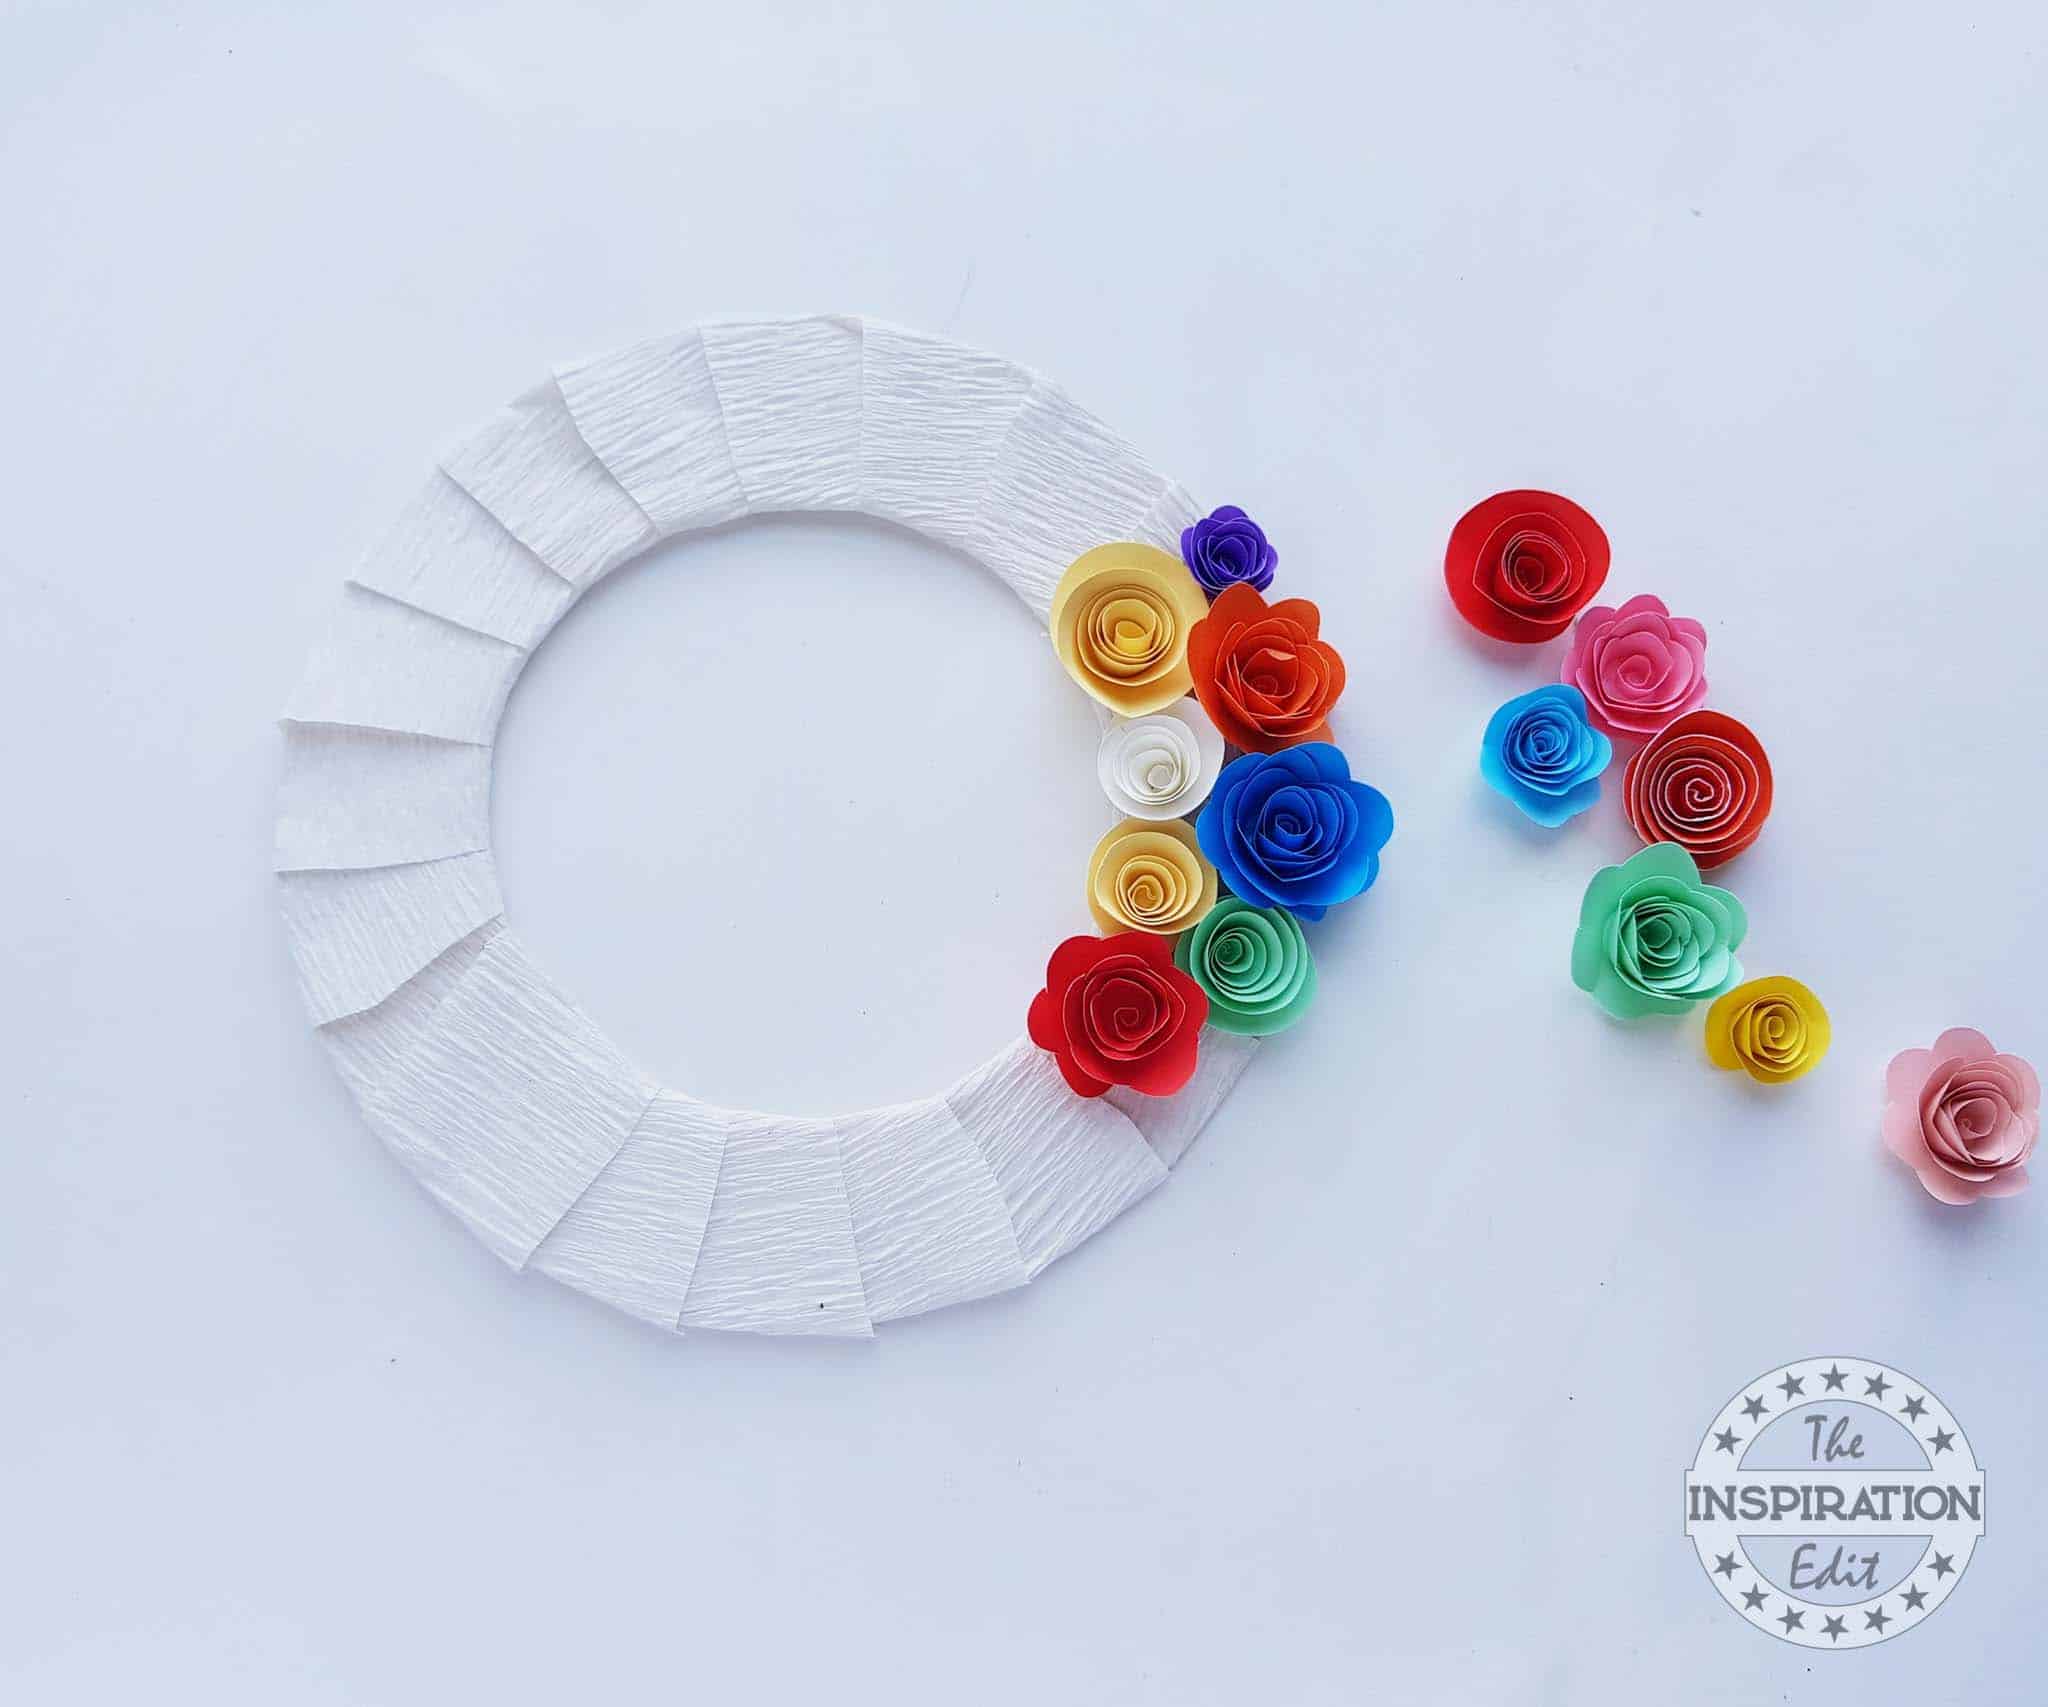
- Step 8: Instead of attaching the paper flowers on the base randomly and in scattered way; try to fill the base by stating from one particular point and attaching the flowers adjacent to each other on the base.
- Step 9: Continue to attach the flowers on the base, keeping a nice and sound colour combination.

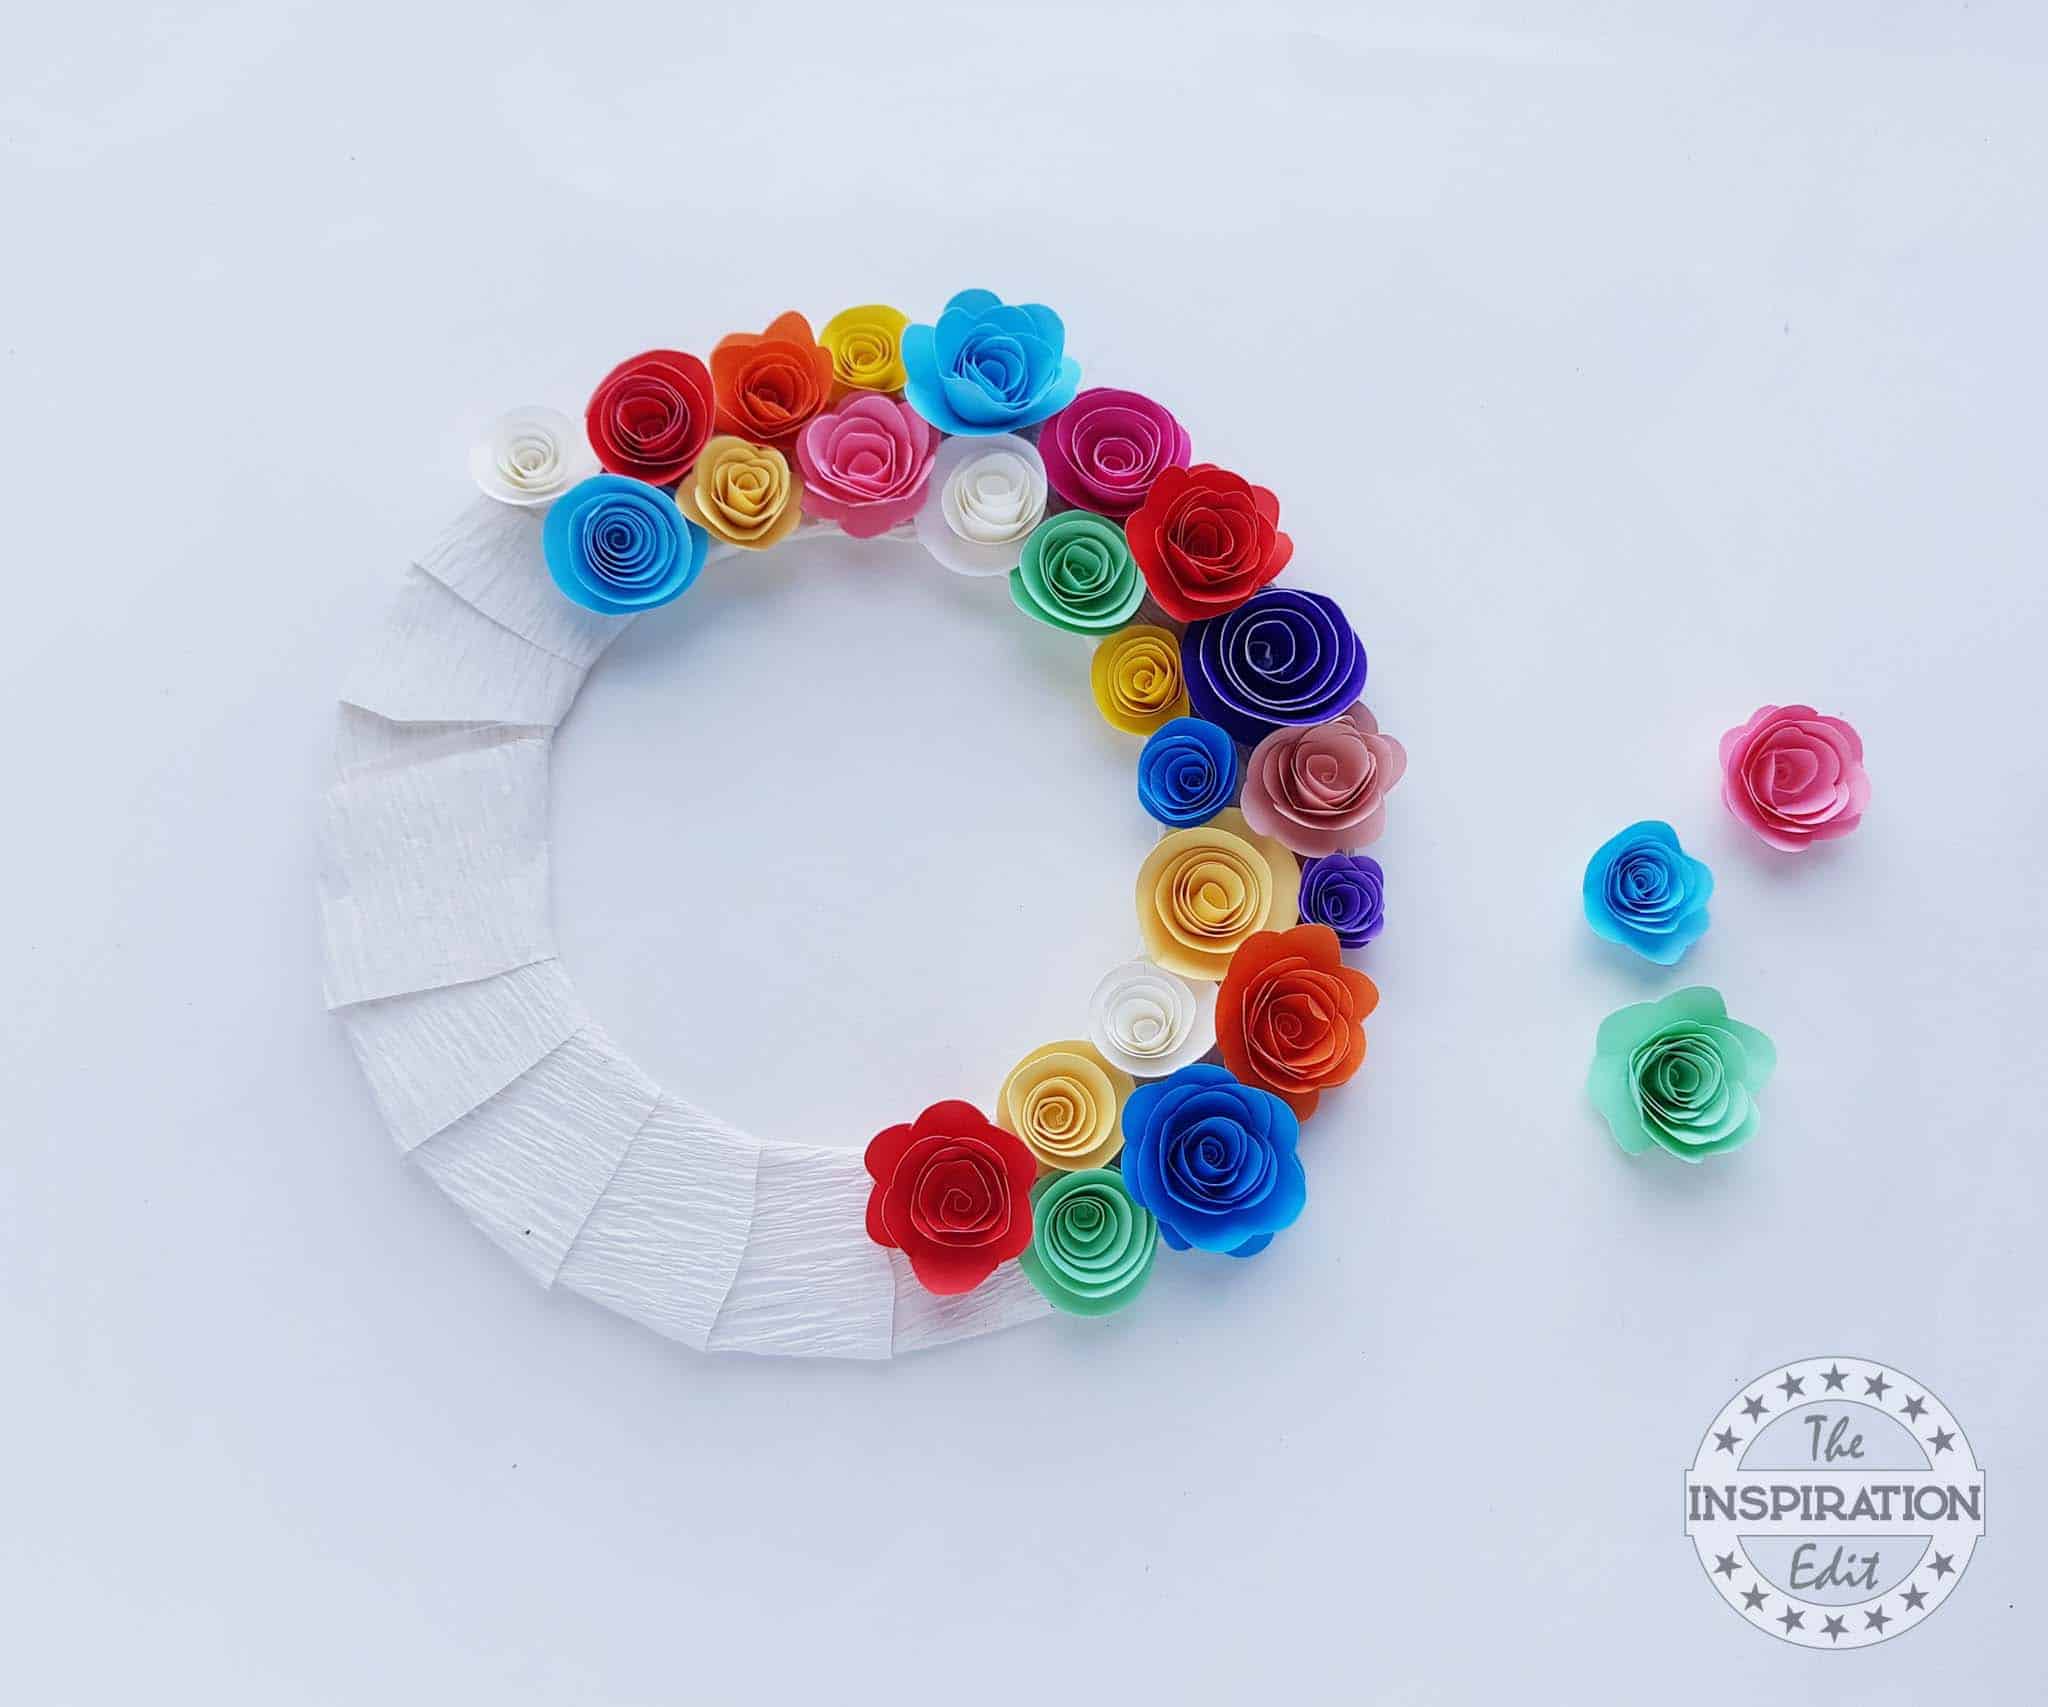
- Step 10: Fill the entire base as neatly as possible.

- Step 11: Take the paper leaf cutouts and attach them between the paper flowers on the base.

- Step 12: Attach as many leaves as you want or until you are satisfied with the wreath pattern.

💡 Pro Tip: Mount the wreath slightly off-center on a square or star-shaped backing for extra dimension and a creative take on traditional round formats.
🧑🎨 Expert Tips
- Clock Accent: Cut out a paper clock face and set the hands close to midnight to anchor your wreath with a central New Year’s symbol.
- Year Numbers: Use bold numerals for the upcoming year and place them across the bottom curve to make the wreath instantly recognizable and time-specific.
- Star Placement: Arrange metallic stars in a spiral or scattered pattern to mimic a burst or explosion, adding motion to the wreath design.
- Message Banner: Add a curved banner that reads “Hello [New Year]” or “Cheers!” stretched across the middle to reinforce the festive tone.
- Color Pop: Combine classic New Year’s colors—gold, silver, and black—with a small accent color like deep blue or fuchsia for a modern celebratory twist.
- Confetti Detail: Use tiny cut circles or glitter pieces glued across the surface to resemble falling confetti, giving the wreath an active, party-like energy.
🖌️ More Christmas Activity Ideas
Love these crafts! Don't forget to pin them on Pinterest or leave a comment and let us know how you got on!


Did you make this craft? Leave a review and comment below! Alternatively, bookmark it in your browser or save to Pinterest.

Easy New Years Wreath Craft Tutorial
Equipment
- Scissors
Materials
- Colored craft papers
- Wreath base round
- Pen
- Pencil
- Craft glue
Instructions
- Grab all the colored craft papers you have, this is a great craft project to use all the scrap papers. Trace the spiral patterns from the provided template on the selected papers. Cut out the traced patterns neatly.
- Take any one of the spiral cutouts and start to roll it from its outer edge. Keep the coil nice and firm. Continue to roll the spiral pattern towards the center.
- Once the coiled pattern reaches the center of the spiral, allow the coiled part to loosen up a little. Glue the coiled part with the center of the spiral.
- One by one coil the rest of the spiral cutouts and create the coiled flowers. Make enough paper flowers to fill the whole wreath base. Also, cut out some leaf patterns from green colored craft papers.
- Grab the wreath base. You can cover the wreath base using paper strips or you can keep it as it is. Either way works as the base will be covered with paper flowers.
- I’ve used a long strip of white crepe paper to cover the whole base.
- Done preparing the wreath base? Grab all the paper flowers and let’s get crafty!
- Instead of attaching the paper flowers on the base randomly and in a scattered way; try to fill the base by stating from one particular point and attaching the flowers adjacent to each other on the base.
- Continue to attach the flowers on the base, keeping a nice and sound colour combination.
- Fill the entire base as neatly as possible.
- Take the paper leaf cutouts and attach them between the paper flowers on the base.
- Final Picture
More Fun Craft Ideas You May Love:


Leave a Reply