
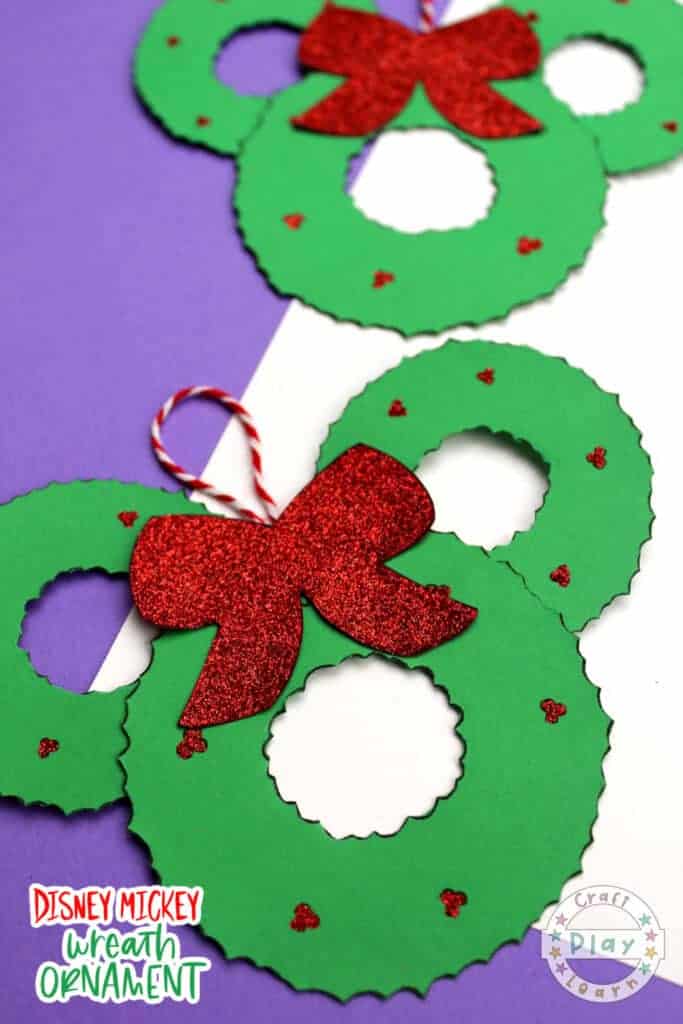
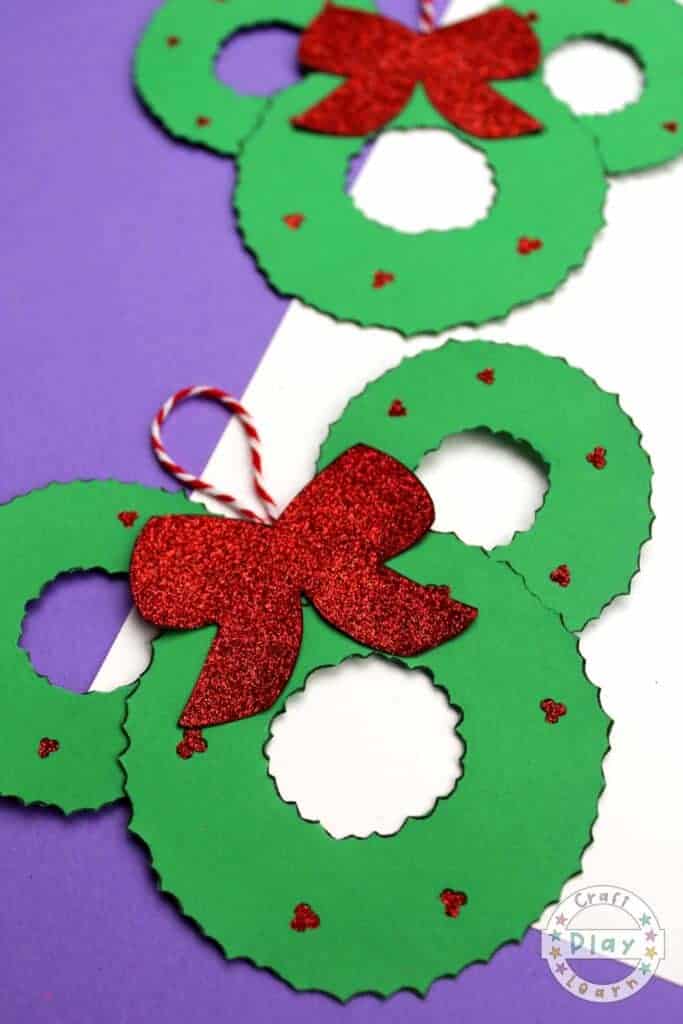
This Minnie Mouse Wreath is such a fun way for the kids to get excited about the upcoming holiday season! If you're ready to learn how to make a paper wreath, this is the craft for you! What better way to combine a fun holiday wreath and Minnie Mouse? Showcase your love for all things Disney AND Christmas with this fun and easy craft!
Jump to:
💖 Why You'll Love This Craft
- Festive Disney Magic: It brings Minnie’s signature charm to your holiday decor, adding a playful twist to the traditional wreath.
- Bow-Tastic Centerpiece: That big red bow steals the show and adds an extra dose of cheer to any door or wall.
- Perfect Photo Prop: Hang it up or hold it—this wreath makes a super cute backdrop for festive family photos.
What Is a Wreath?
A wreath is a simple home decoration that can be made or purchased at the store. There are several types of wreaths that you can easily use. Some are made from flowers or sticks while others can be crafted using paper as well.
🎨 Supplies Needed
🖌️ How to Make This Disney Christmas Wreath From Paper
- Step 1: Download the free printable wreath template.
- Step 2: Print all three pages of the template on the correct color of card stock. The color is listed at the top of each page. You’ll have extra pieces, so you can use them to make more than one Disney inspired craft.
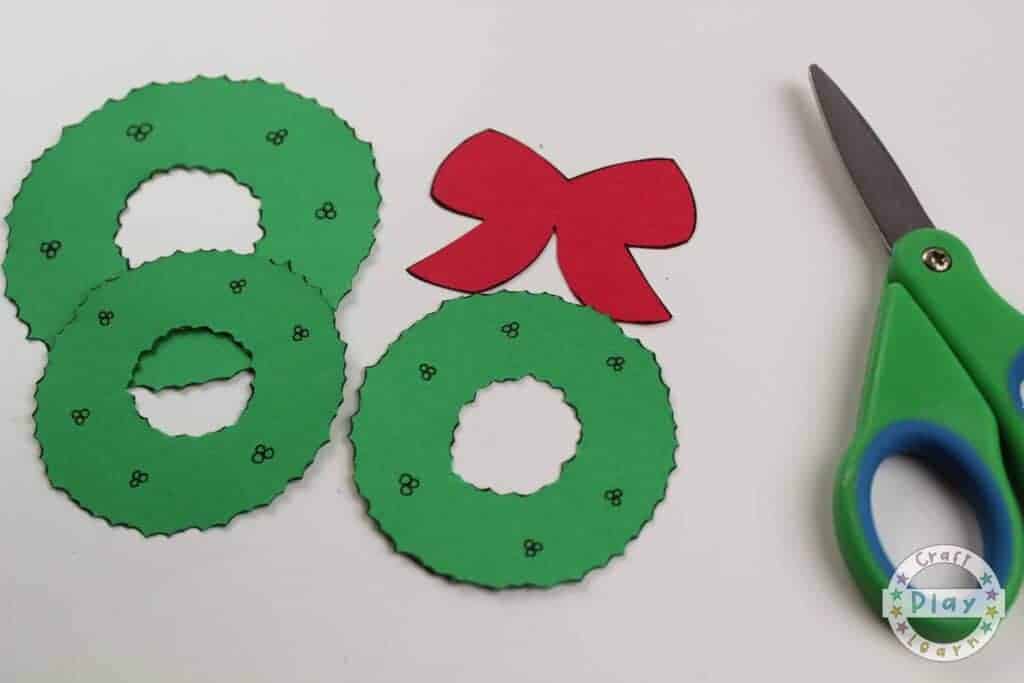
- Step 3: For each wreath ornament, cut out 2 wreath ears, a bigger wreath for the head and a bow.
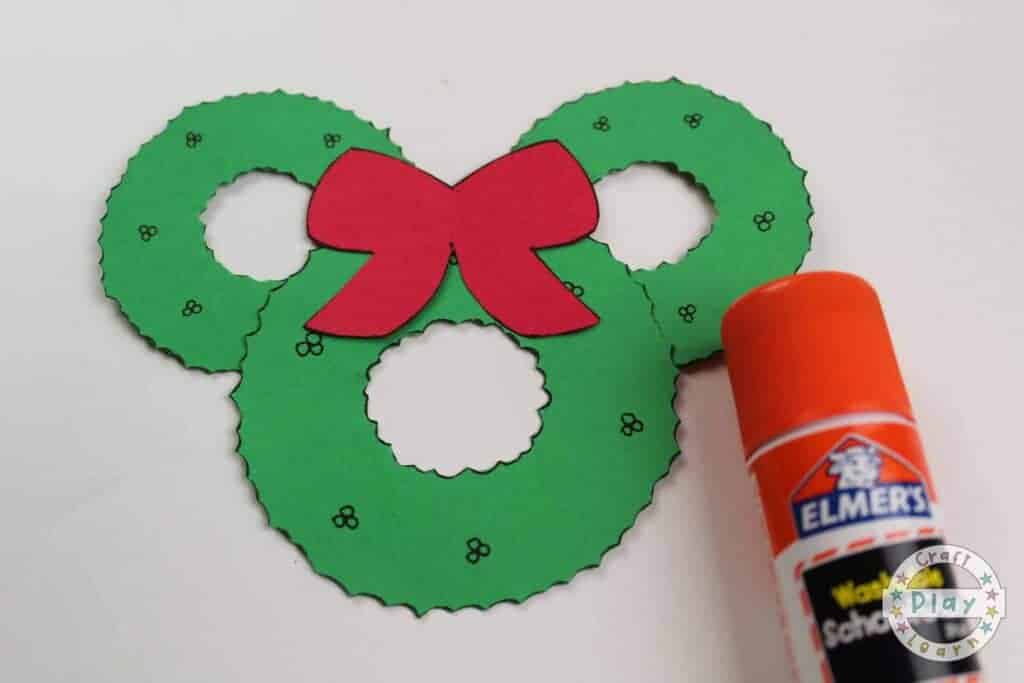
- Step 4: Glue the ears behind the head and the red bow to the front. Add red glitter to the bow and to the holly berries on the wreath.
- Step 5: Make a hanger by looping a piece of twine and gluing it to the back of your Mickey head ornament.
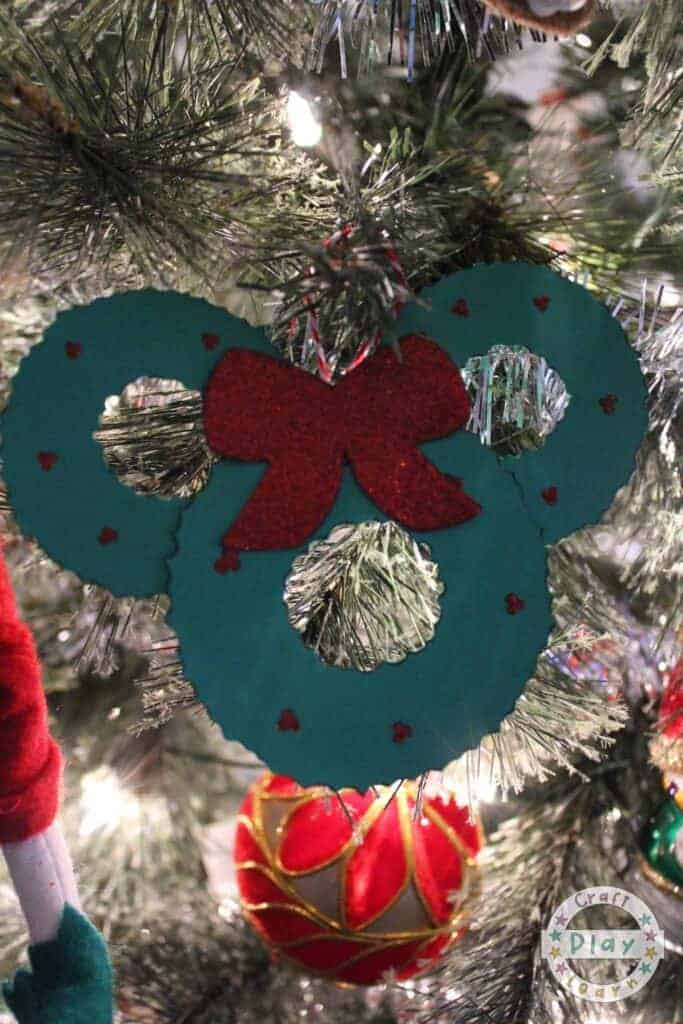
- Step 6: Let the glue dry completely, and then your Disney inspired ornament is ready to hang on your Christmas tree.
💡 Pro Tip: Store the wreath in a cool, dry place during off-season months, using a protective cover to preserve its condition for future use.
🧑🎨 Expert Tips
- Frame Stability: Securely fasten the wreath's base components using durable wire to maintain shape and prevent sagging over time.
- Ear Attachment: Ensure the "ears" are evenly aligned and firmly connected to the main wreath to preserve the iconic silhouette.
- Bow Placement: Position the bow at the top center, anchoring it tightly to prevent shifting and to maintain visual balance.
- Ornament Distribution: Evenly space decorative elements around the wreath to achieve a harmonious and full appearance.
- Hanging Mechanism: Attach a sturdy loop or hook at the back of the wreath to facilitate secure and level hanging.
- Weatherproofing: If displaying outdoors, apply a protective sealant to shield the wreath from moisture and environmental elements.
🖌️ More Christmas Themed Craft Ideas
Love these crafts! Don't forget to pin them on Pinterest or leave a comment and let us know how you got on!


Did you make this craft? Leave a review and comment below! Alternatively, bookmark it in your browser or save to Pinterest.
Here are some more Christmas paper decorations you will love:

Minnie Mouse Wreath Decoration for Christmas
Materials
- Cardstock
- Glue
- Scissors
- Ribbon, Thread, Twine Etc.
- Glitter
Instructions
- Download the free printable wreath template.
- Print all three pages of the template on the correct color of card stock. The color is listed at the top of each page. You’ll have extra pieces, so you can use them to make more than one Disney inspired craft.
- For each wreath ornament, cut out 2 wreath ears, a bigger wreath for the head and a bow.
- Glue the ears behind the head and the red bow to the front. Add red glitter to the bow and to the holly berries on the wreath.
- Make a hanger by looping a piece of twine and gluing it to the back of your Mickey head ornament.
- Let the glue dry completely, and then your Disney inspired ornament is ready to hang on your Christmas tree.

Leave a Reply