

A bathroom should support the way people actually move through their day, not simply look updated. A thoughtful shower remodel can improve comfort, reduce cleaning chores, and make entering or exiting the bathing area feel more secure.
Zintex is an established walk-in shower specialist with more than 25 years of experience, offering low-threshold and barrier-free designs, grout-free walls, seating, grab bars, storage, and enclosure options for homeowners in markets including Nashville, Tennessee.
Whether the goal is aging in place, recovering from an injury, helping a family member, or replacing an outdated tub, the strongest results come from balancing access, moisture control, maintenance, and personal style from the start.
Jump to:
- Why Shower Planning Matters
- Assess the Existing Bathroom
- Choose an Entry and Safer Floor
- Plan Support Features Before Construction
- Choose Easy-Clean Surfaces Without Ignoring Installation
- Control Moisture With Ventilation
- Coordinate Fixtures and Storage
- Build a Realistic Remodel Plan
- FAQ’S
- Final Planning Checklist
Why Shower Planning Matters
Older bathrooms often combine a high tub wall, slick finishes, weak lighting, crowded bottle storage, and a narrow walking path. Those details matter because people turn, bend, step, and balance in a wet environment every day.
CDC bathroom fall prevention research found that falls caused most nonfatal bathroom injuries in the study, with injury rates increasing with age. A safer shower does not eliminate every risk, but it can remove avoidable obstacles.
Assess the Existing Bathroom
Before selecting tile, panels, or fixtures, inspect the room carefully. Measure the shower footprint, doorway width, ceiling height, surrounding clearances, and the path from the bathroom door to the shower.
Confirm where supply lines and drains are located, and look for soft drywall, stained trim, cracked grout, loose tile, or signs of past leaks.
Also consider the people who use the room now and may use it later. Ask whether someone needs a shower chair, walker, wheelchair access, caregiver assistance, or a seated bathing option.
Note where towels, shampoo bottles, pet supplies, and cleaning products currently collect, since clutter can quickly become a tripping issue.
Choose an Entry and Safer Floor
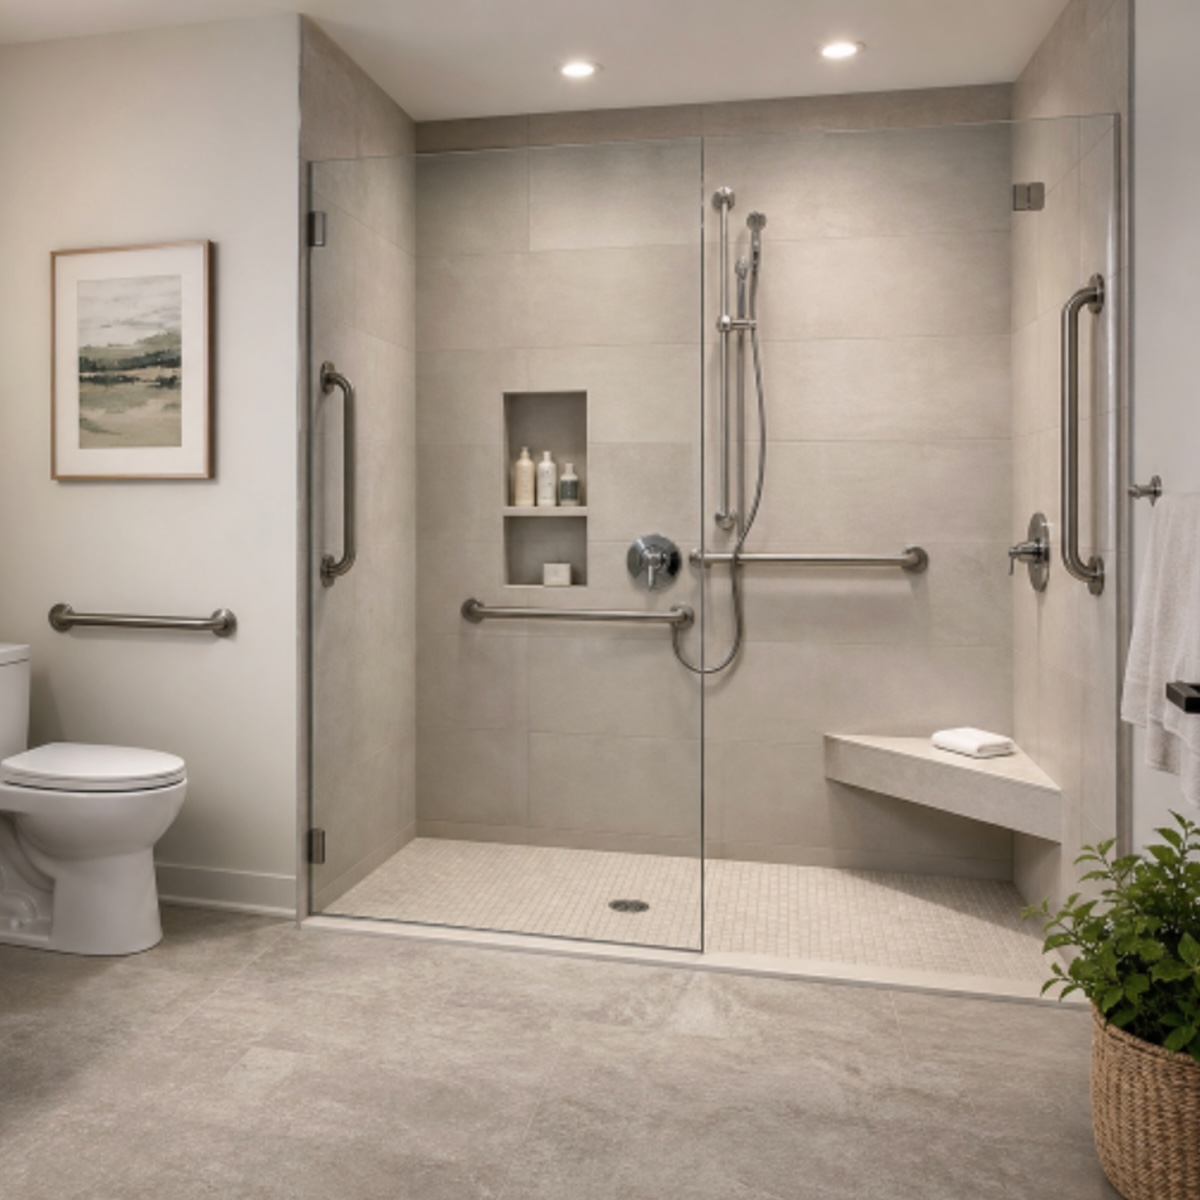
A low-threshold shower has a small curb that helps contain water while reducing step-over height. A curbless shower creates a nearly level transition and can be helpful for wheelchair or walker access when floor structure and drainage permit it.
A standard curb may still work well in some homes, but it requires more attention to balance and entry height. Many tub-to-shower conversions reuse the existing footprint while changing how the user enters the space.
Curbless designs require precise framing, waterproofing, slope, and drain placement. Select a floor surface suited to wet conditions, and avoid highly polished finishes that may become slick with soap or water.
The transition into the rest of the bathroom should be smooth, while bath mats should lie flat and stay outside the main walking route.
Plan Support Features Before Construction
Support features are most effective when they are included in the layout before walls are closed. Properly mounted grab bars should be placed near the entrance and where users stand, sit, or turn.
They need suitable backing and secure installation, so suction-cup products should not be treated as replacements for permanently installed bars.
- Built-in or fold-down seating: Helpful for users who tire easily or prefer a seated shower.
- Handheld showerheads: Useful for bathing while seated, rinsing hard-to-reach areas, and cleaning the enclosure.
- Reachable controls: Let users adjust water before stepping into the spray.
- Bright, even lighting: Reduces shadows, glare, and dark corners around the entrance.
Choose Easy-Clean Surfaces Without Ignoring Installation
Tile offers extensive design flexibility, but grout needs routine care, and the assembly behind it must be waterproofed correctly. Acrylic and solid-surface panels can reduce grout lines and make wipe-downs simpler.
Natural stone provides a distinctive appearance but may require sealing and specialized cleaning. Glass makes a room feel more open, although frequent squeegeeing can help limit water spots.
Fewer seams can reduce cleaning effort, but no wall material is maintenance-free. Inspect caulked joints, corners, fixtures, and doors regularly. A durable shower depends as much on the waterproofing system behind the visible finish as on the finish itself.
Control Moisture With Ventilation
Ventilation is a performance feature, not an afterthought. Use an exhaust fan sized for the room and vented outdoors, run it during bathing and afterward, and keep air moving when practical.
The EPA notes that good indoor air quality during remodeling depends in part on controlling pollutants and moisture. In daily use, watch for recurring condensation, peeling paint, stained ceilings, or mildew around joints.
Coordinate Fixtures and Storage
Choose fixed, handheld, rainfall, or dual showerheads based on the household's routines. Place niches, corner shelves, or ledges within easy reach so bottles stay out of the walking path.
Recessed niches can create a cleaner wall profile, while hooks and towel bars belong just outside the wet zone. Finally, choose a curtain, sliding door, pivot door, or open entry that fits available clearance without making access harder.
Build a Realistic Remodel Plan
- List the problems the new shower must solve.
- Document measurements, photos, plumbing locations, and visible damage.
- Select the preferred entry, floor, walls, fixtures, storage, lighting, and support features.
- Request written scopes that specify demolition, plumbing, electrical work, waterproofing, permits, cleanup, and warranty terms.
- Compare timelines and reserve part of the budget for hidden damage behind old walls or flooring.
A professional remodeler can help coordinate those decisions, especially when the project involves drainage changes, structural work, accessibility goals, or a tub conversion.
The right contractor should explain what is included, what may change after demolition, and how the bathroom will remain usable during construction.
FAQ’S
Not automatically. It can improve access, but it must have a correct slope, drainage, waterproofing, and enough surrounding clearance to work safely.
No. They can reduce scrubbing and eliminate grout care, but they still need routine cleaning, drying, and inspection.
Yes, when possible. Planning them early allows proper wall reinforcement and placement based on the user's movements.
Often, yes. The final design depends on the existing footprint, plumbing, framing, drainage, moisture protection, and local requirements.
- Parents Are Prioritising Breathable, Sustainable Fabrics For Children's Seasonal Sleepwear
- Our Homemade Christmas Printables, Made With AI: What Worked, What Didn't, and What I'm Saving for Next Year
- At-Home vs. In-Lounge IV Therapy in the Hudson Valley: Which Makes More Sense?
- Can Passengers Pursue Compensation After a Car Accident?




Final Planning Checklist
- Confirm the entry style and surrounding clearance.
- Choose stable flooring and plan drainage carefully.
- Locate seating, grab bars, controls, fixtures, and storage within easy reach.
- Select wall materials based on both appearance and upkeep.
- Improve lighting, ventilation, waterproofing, and daily moisture control.
- Compare written proposals from qualified remodeling professionals.
A better shower can refresh a bathroom while making everyday routines easier and more confident. The best plans bring safety, comfort, durable moisture management, simple cleaning, and personal style together before the first wall is opened.





Leave a Reply