Super Cute Paper Bag Dog Puppet
This is a tutorial on how to make a paper bag dog puppet
Calories:
Equipment
- Scissors
Materials
- Cardstock or Construction Paper
- Paper Bags
- Glue
- Black Marker
Instructions
- Download and print out the dog puppet template.
- Cut the dog puppet template out.
- Cut large squares of cardstock or construction paper and glue onto the paper bag.
- You want to glue on the side that the square bottom flaps up.
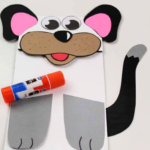
- Trace the template onto cardstock and cut out. (refer to the photos)
- Cut a tiny bit of white paper and glue it onto the dog’s nose.
- Cut a red mouth from cardstock and glue onto the dog’s muzzle. Use a black marker to add detail to the dog’s muzzle and paws.
- Glue the ears together. Glue the tail onto the back of the paper bag.
- Glue the dog ears onto the top of the paper bag.
- Glue the muzzle at the bottom of the flap.
- Glue the paws towards the bottom of the paper bag.
- Cut out the eyes and glue above the muzzle.
- Cut a piece of paper into a zig-zag and then glue on top of the dog’s tail.
- Trim off the excess paper. Cut a small silver or grey circle.
- Cut a smaller circle and cut out the inside.
- Glue the pieces together.
- Use a black marker to write a dog’s name onto the tag.
- Cut a strip of coloured paper and glue just below the flap.
- Glue the tag on top. Your paper bag dog puppet is finished!