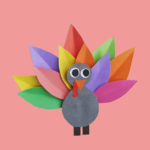
Rainbow Thanksgiving Turkey Craft For Kids
This is a tutorial on how to make Rainbow Thanksgiving Turkey craft!
Yield: 1
Calories:
Materials
- Coloured craft papers
- Cardstock paper
- Pencil
- Black sharpie
- Craft glue
- Scissors
Instructions
- Prepare the template by printing and cutting them out. Select coloured craft papers and trace the template patterns on them. Use scissors to cut out the traced patterns.
- Take the lens shaped cut outs and create a crease along their middle line, lengthwise. This crease will give the turkey pattern a popped up look.
- Use a black sharpie to draw the eyes on the 2 round cut outs.
Complete the turkey body pattern by sticking the items on their appropriate places. - Take the arch shaped base and start sticking the big lens shaped cut outs around the base.
- Once you are done sticking the big lens shaped cut outs, take the small ones and stick them below the previous layer.
- Prepare 3 or 4 small pieces from cardstock paper, glue and stack them together.
Place the stacked cardstock pieces on the bottom side of the arch shaped base, right where the second layer of lens shaped cut outs end. - Apply a small amount of glue on the cardstock stack and place the turkey body on it neatly.
- Though this is optional, but you can also add 2 square cut outs on the bottom side of the turkey body for the legs. Allow the glue to dry. Meanwhile gather more coloured craft papers and make more!