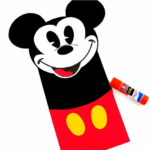
Mickey Mouse Paper Bag Craft
This Mickey Mouse Paper Bag Craft turns a plain paper bag into a Disney-inspired treat bag or puppet using paper, glue, scissors and a printable template.
Calories:
Materials
- Printer To print out Disney Template
- Construction Paper Red, Black, White, Yellow
- Pencil For tracing
- Paper Bag Optional
- Black Marker Pen
- Scissors
- Glue Stick
Instructions
- Begin by printing out your Mickey Mouse template as instructed on the PDF. Print Mickey's face on white paper and use the trace around the templates onto the correct color cardstock.
- Cut out all the template pieces and glue the black paper to the paper bag or piece of paper.
- Next Glue the red paper and add the yellow buttons to the Mickey Mouse Puppet as shown above.
- Assemble the pieces together to create the face of Mickey Mouse.
- Draw a smile onto the face using your black marker pen and glue the red tongue in place. Add the eyes and nose to the white face and then glue this to the large Background which makes Mickey's head.
- You can now add Mickey's ears to the back of the head and finally glue the completed Mickey face, head and ears to the body of Mickey.
- Once all the pieces are glued together you have your fantastic Mickey Mouse craft ready to use or display. It's super simple and a fun activity to make at home with the kids.