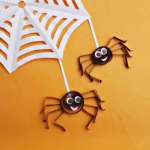
Halloween Craft Quilled Spider Project For Kids
Create creepy-cute paper quilled spiders for Halloween with this Halloween Craft Quilled Spider Project for Kids.
Calories:
Materials
- Quilling Paper Strips
- Craft Paper Pink
- Black Sharpie
- Craft Glue
- Slotted Quilling Tool
- Scissors
Instructions
- Now I will show you how to make these cute quilled spiders. It’s easy and simple and great for both kids and adults to make.
- Take out the coil from the tool and place it on a flat surface; allow the coil to loosen up.
- Once you are satisfied with the coil size, glue the open end of the coil to secure it.
- Determine the size of the spider legs and cut out 8 pieces from a quilling strip according to it.
- Also, Cut out 2 round shapes from white craft paper for the eyes (size of the eyes would depend on the size of the loose coil prepared in step one).
- Use the black sharpie to draw the eye balls on the white cut outs. Cut out the mouth from pink craft paper.
- Take any one of the strips prepared in step two and fold it into half. Then, fold 0.5 cm from its open ends.
- Similarly prepare the rest of them. These are the spider legs.
- Take the loose coil and start to glue the legs around its side.
- Simply apply glue on any one of the 0.5 cm folded parts of the legs and attach it with the loose coil shape on its side.
- Attach all 8 legs; 4 legs on each side.
- Finally stick the eyes and the mouth on the loose coil to complete the spider.
- Allow the glue to dry.