6 Step Easy Origami Leaf
Origami leaves can be used in so many ways. They are a beautiful way to decorate any room or event or can be used to make paper leaves for a fake tree.
The possibilities are endless!
However, most origami leaf designs can be complicated, many of which require dozens of folds.

If you are looking for the easiest origami leaf there is, you are in the right place! This guide will show you how to make an origami leaf in six simple steps.

Supplies for Making an Origami Leaf
Contents
This paper leaf can be made using a single sheet of square paper—including craft paper or printer paper cut into a square.
However, I highly recommend using origami paper for the cleanest creases and to establish a leaf with that traditional origami feel.
I’ll be using duo kami origami paper with white on one side and green on the other.
Origami Leaf Directions
Stretch those paper-folding fingers, and let’s get to it!
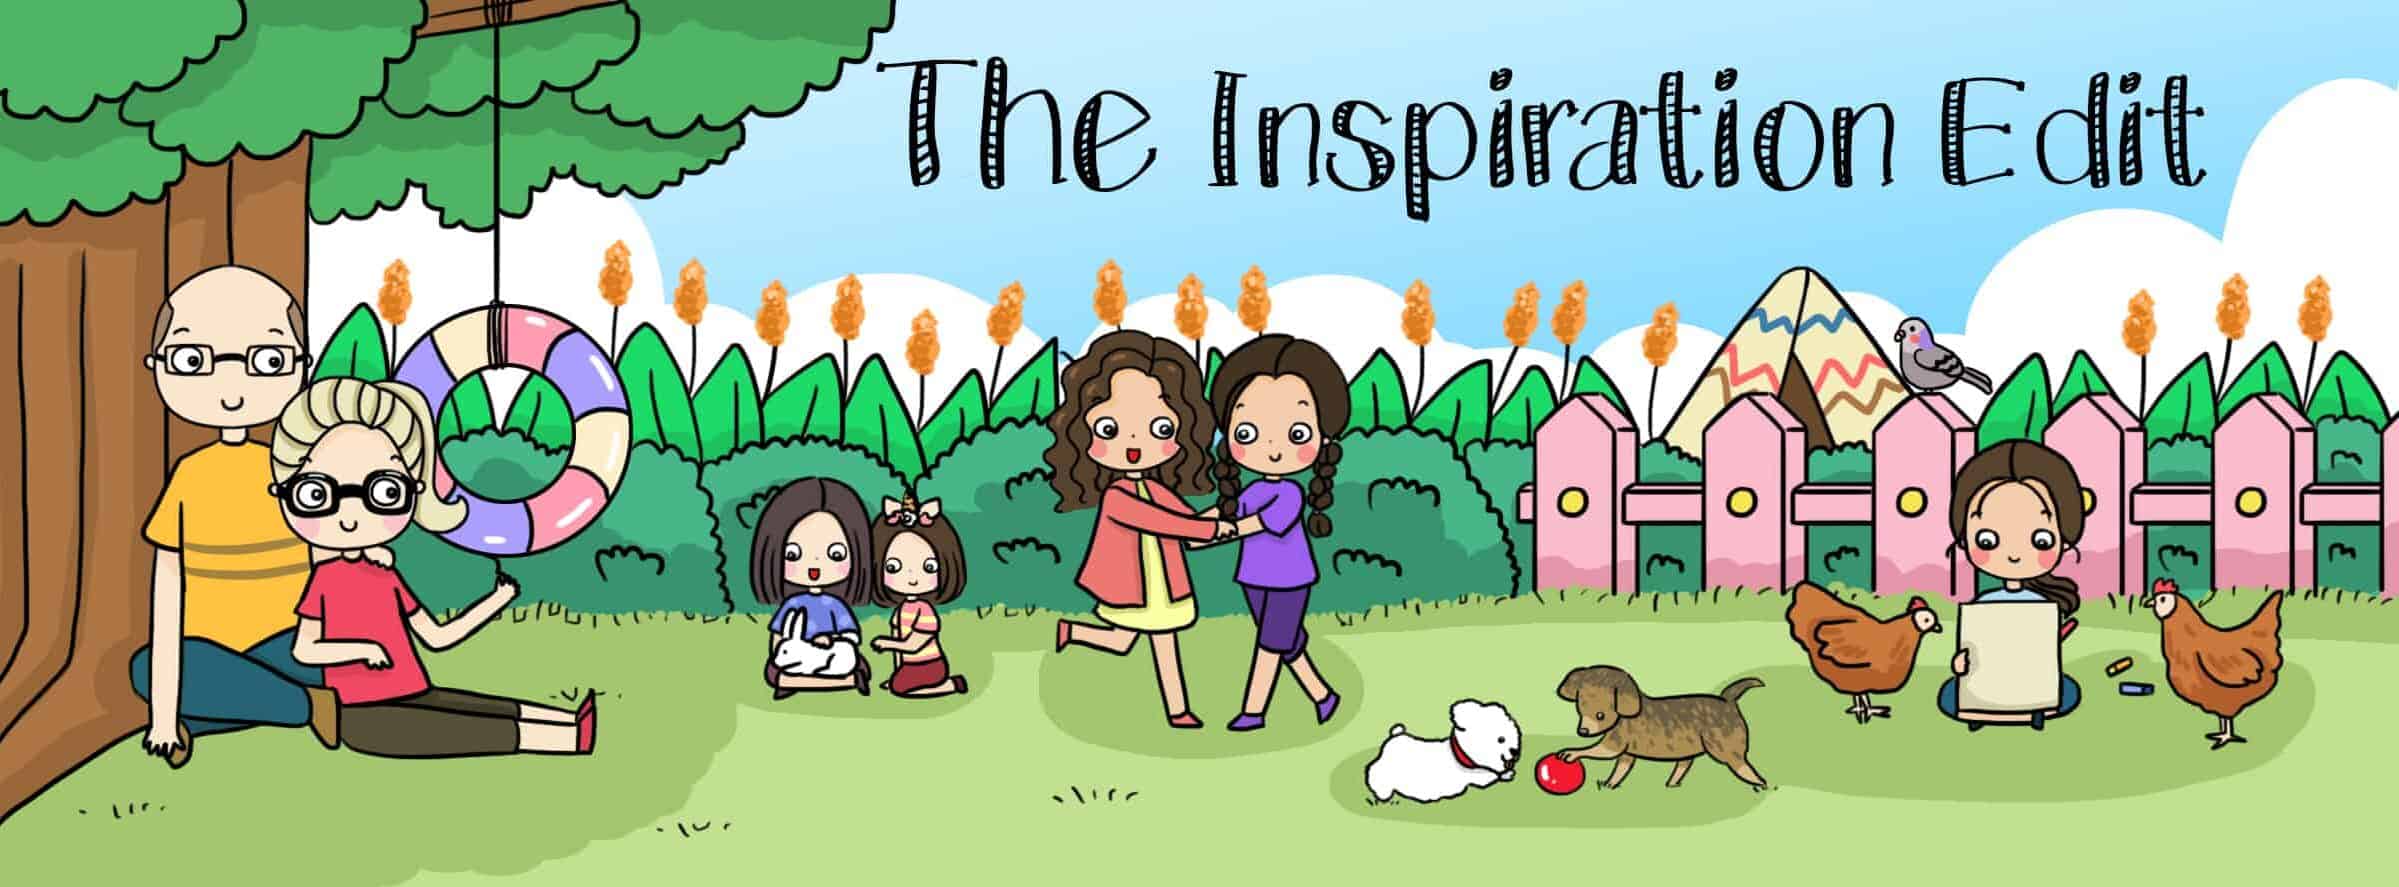
Step 1: Fold the Paper in Half Vertically, Then Unfold
If you are using paper with different colors on each side, you’ll want to flip the paper so that your desired leaf color is facing down.
Begin by rotating the paper so that you have a corner facing left and right, essentially making a diamond. Then fold the paper in half vertically by bringing the right corner over to the left corner. Crease it well and then unfold.

Step 2: Fold the Lower Edges to the Center Crease, Then Unfold
Next, fold the lower-left and lower-right edges to the center crease that we made in the previous step. Once again, crease it well and unfold.
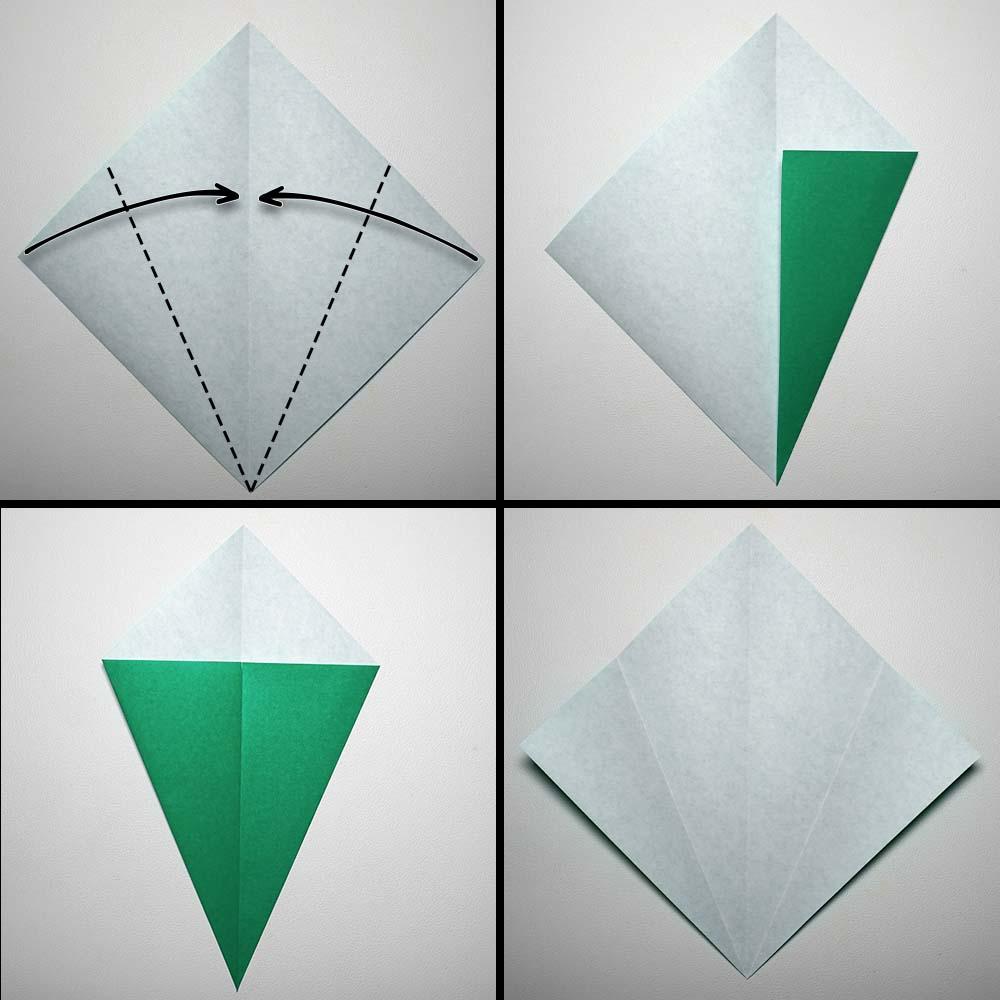
Step 3: Fold the Right and Left Corners to the Nearest Diagonal Creases
Starting with the right side, fold the corner down and align it with the nearest crease—which we made in the previous step. Repeat with the left corner.
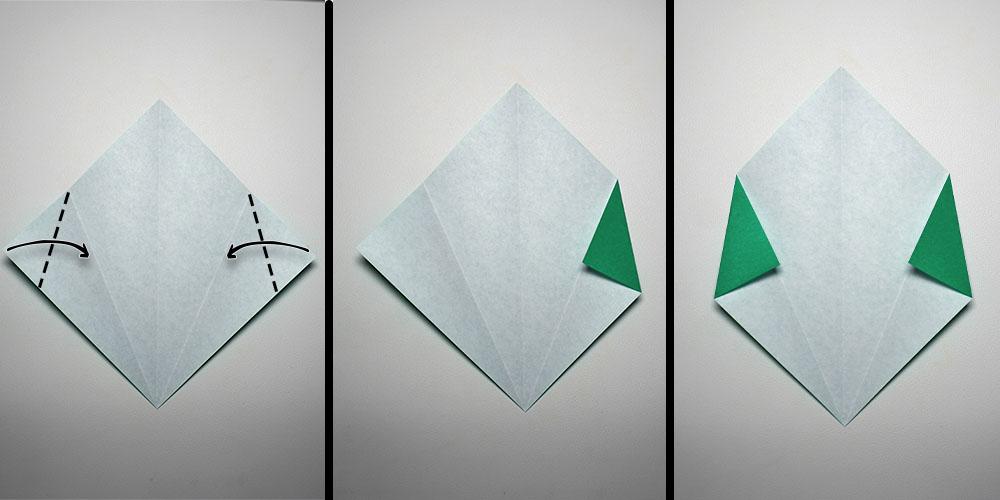
Step 4: Fold the Paper in Half, Right to Left
Fold the paper in half vertically and bring the right edge over to the left edge.
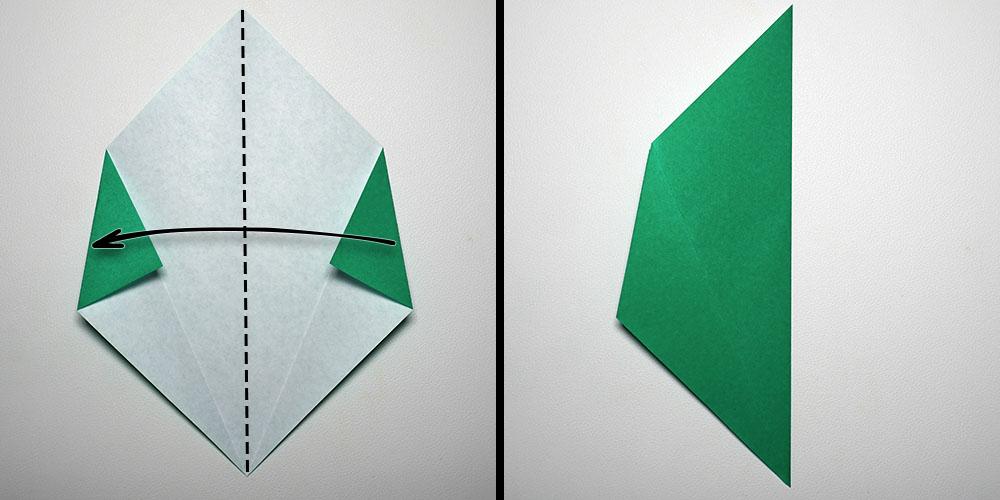
Step 5: Fold the Top Layer to the Right, at a Slight Angle
Grab the upper layer and fold it over to the right at a slight angle (as seen above). It may help to place a slight bend at the bottom to help make a straight crease.

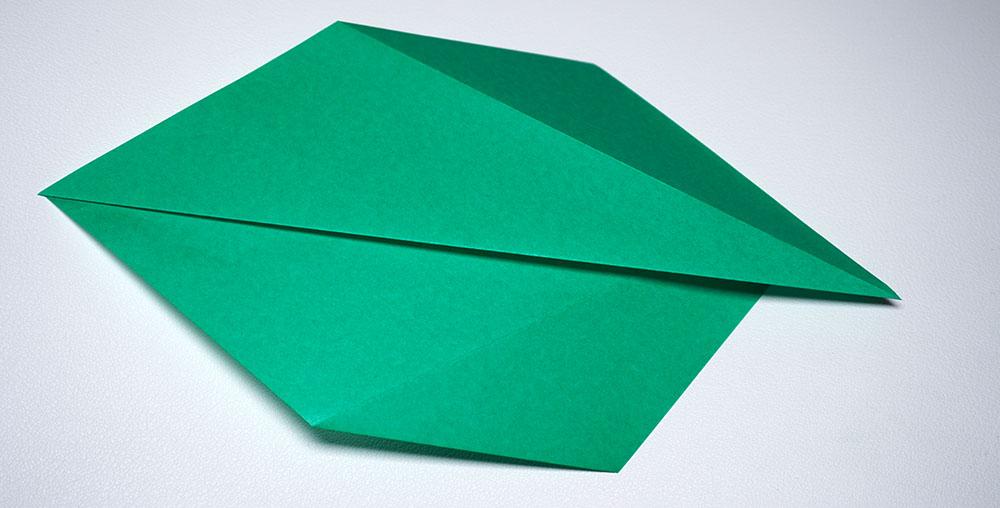
Step 6: Flip It Over and Celebrate
Now flip the paper over, and there you have it, an easy origami leaf!

Easy Origami Leaf
If you’re looking for a way to stretch your creativity and imagination, origami is the perfect art for you. Origami has been around for centuries, and people worldwide enjoy it because it’s a great way to relax and have fun.
Whether you’re a beginner or an experienced origami artist, we hope you will continue to explore this fascinating craft. There are many different origami models, ranging from this simple leaf to complex designs that take hours to complete.
If you would like to learn more about the wonderful craft of origami, consider checking out some other easy origami designs at The Daily Dabble to get you started.
Thanks for reading and happy folding!
Angela Milnes is a Qualified Early Years Teacher who has specialised in Preschool and Kindergarten teaching. She has a wealth of experience teaching young children and is passionate about kids crafts and having fun as a family. Angela has also taught cooking skills and loves to share both family recipes and easy crafts here on The Inspiration Edit. Follow her on Pinterest!


