4th July Paper Flower Craft
4th July Paper Flower Craft
Paper flower crafts are really fun to make and today we are sharing a fun 4th of July Paper Flower craft idea. It’s super fun and easy and can be great for helping kids develop fine motor skills. This is also a fun idea for older kids making a 4th of July scene in the classroom or at home. Enjoy!

Supplies for This Paper Flower Craft
Contents
RELATED POST: DIY PAPER DAHLIA FLOWER CRAFT FOR KIDS

Caydo Double Sided Lightweight Construction Paper A4 Coloured Paper 20 Colors 60 Sheets and 1 Pieces Plastic Safety Scissors Elmer’s E304 Glue (2 Piece)Scotch Precision Scissor, 6-Inches (1446), 1-pack


Let’s Make the 4th July Paper Flower Craft
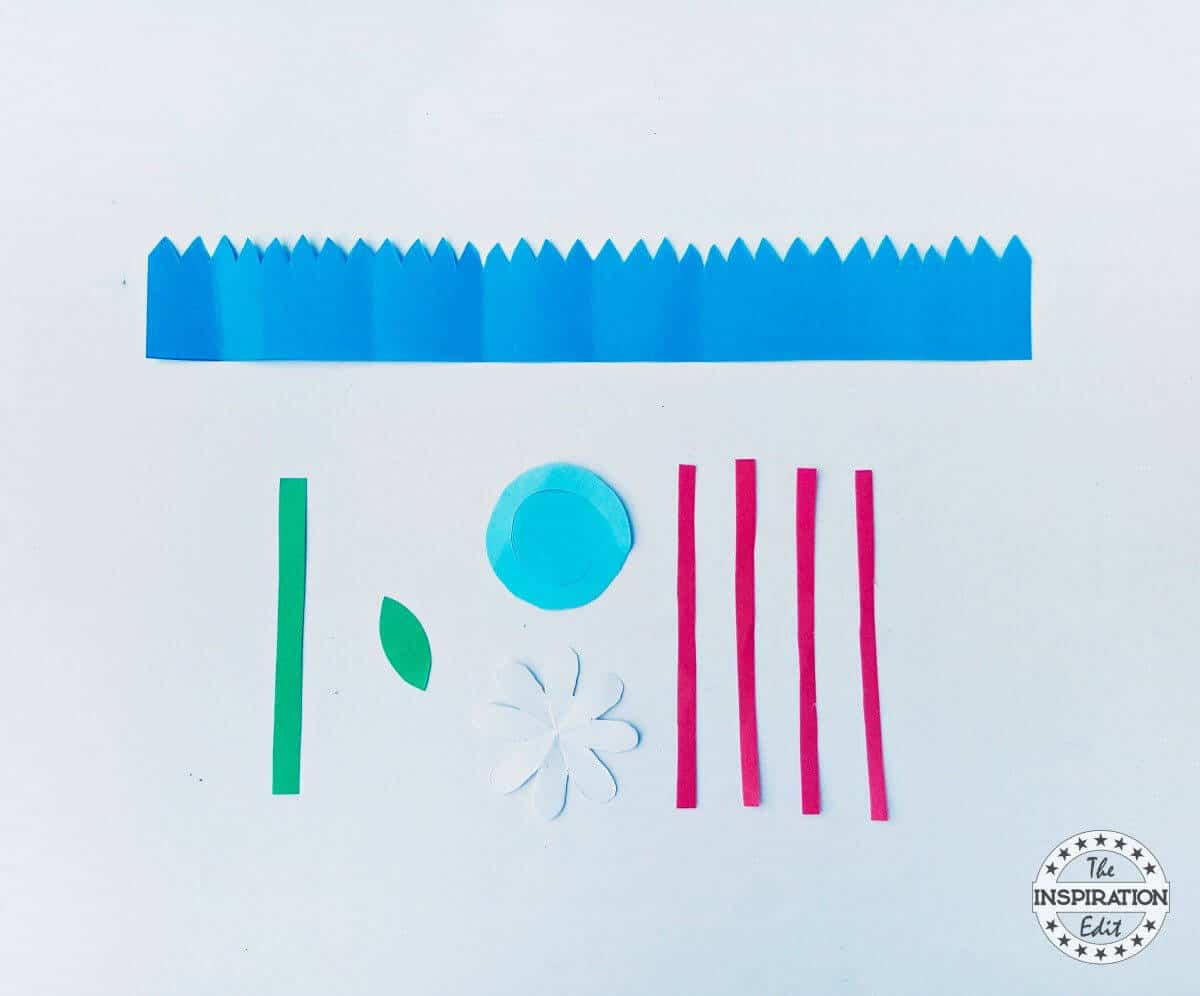
Prepare the patterns from the given template. Select different shades of red and blue coloured craft papers.
Trace the template patterns on the selected papers, you may also use white paper. Cut out the traced patterns.
Take the strip with zigzag edge and start creating accordion folds along the length of the strip.
The zigzag edge can guide in creating neat and even accordion folds.
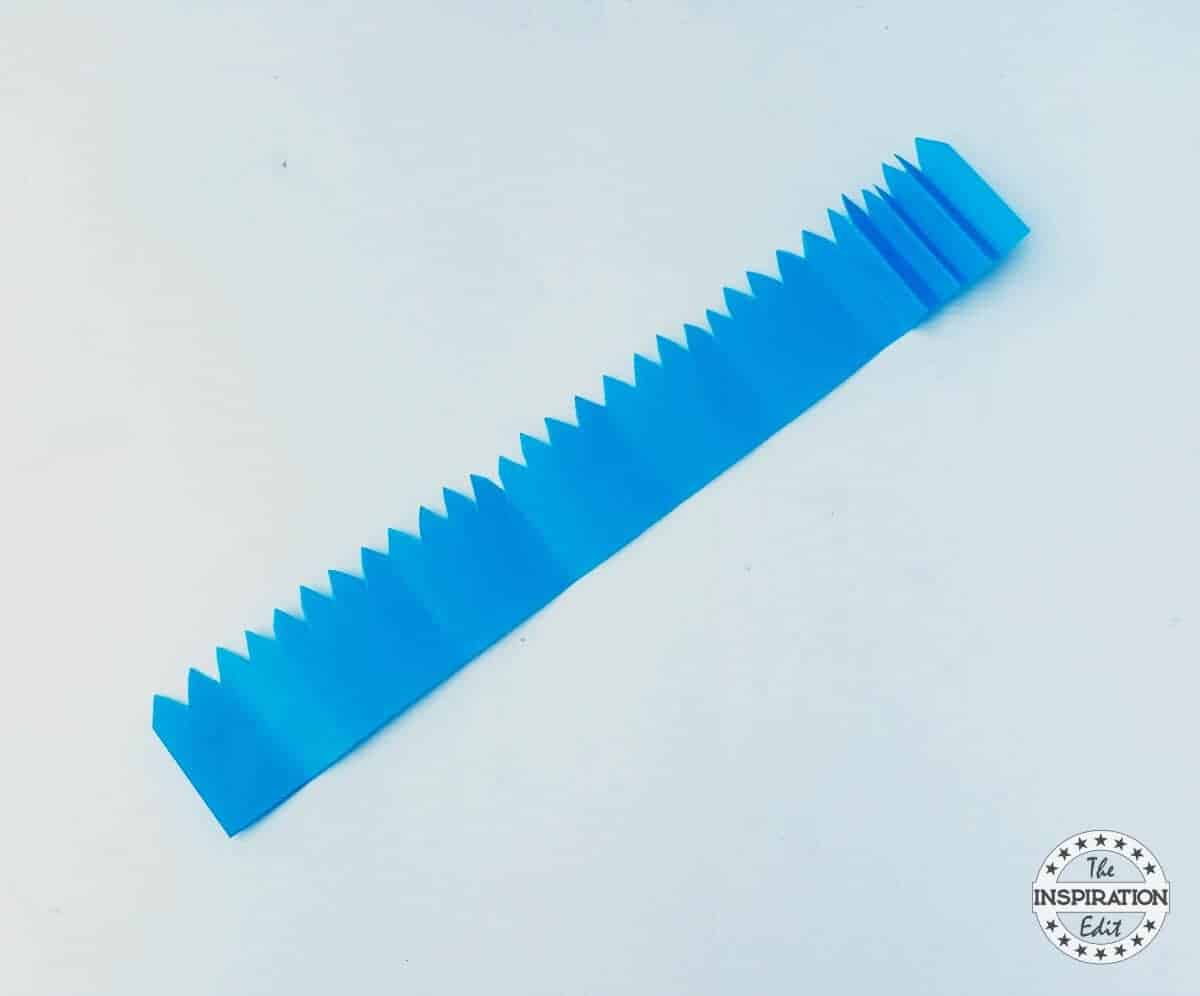
Keep folding the strip until reaching the other end of the strip.
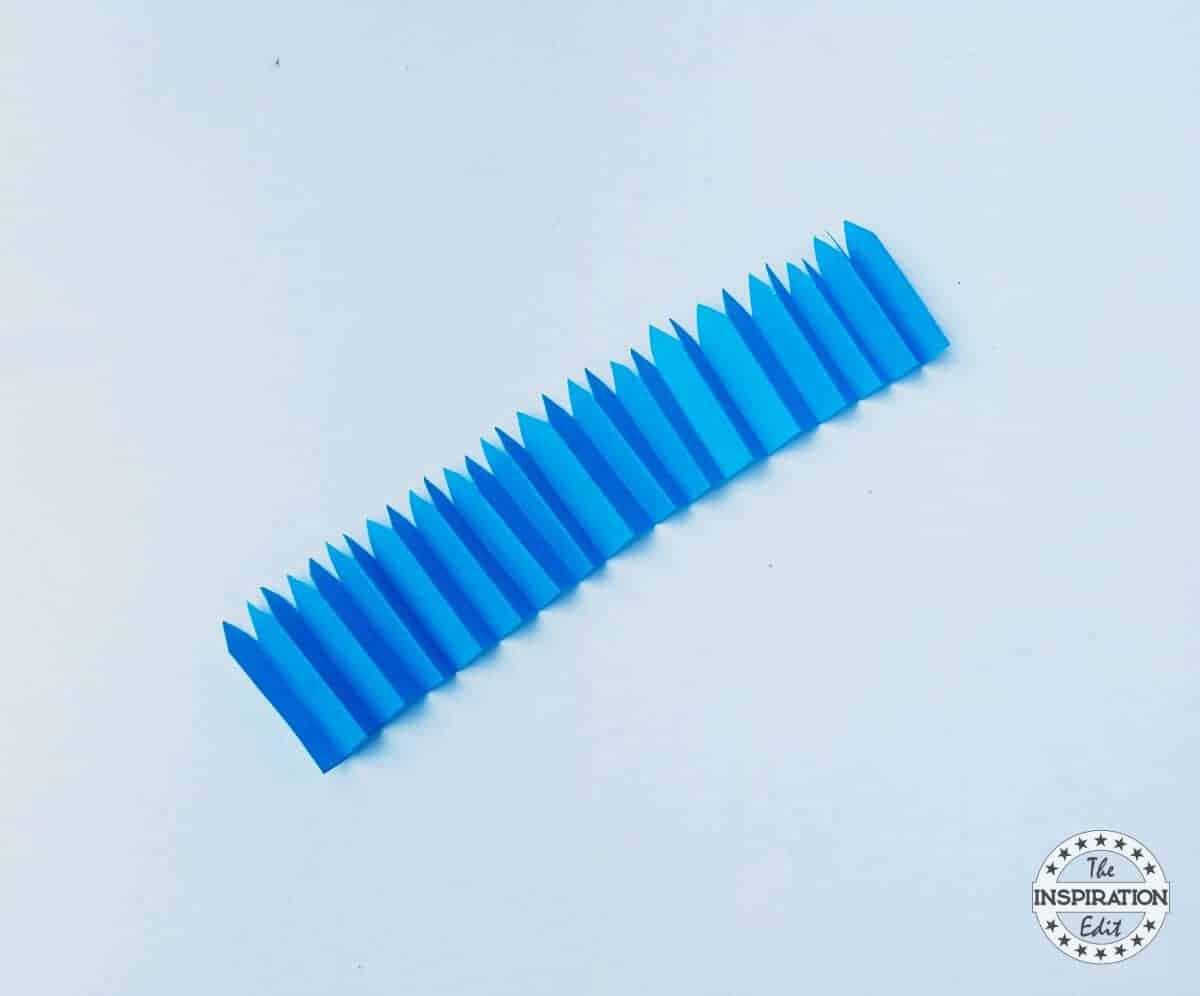
Apply a small amount of glue on any one folds of either open ends if the strip.

Join the glued end of the strip with the other end of it to form an accordion folded ring.

Hold and gather the straight part of the folded strip; press it towards the center to flatten it.
Cut out 2 small pieces of paper and apply glue on them.
Place a glued paper on the center of the flattened accordion folded piece.
Similarly attach the other glued paper on the other side of it.

Now take the 4 thin strips and place any one of them on a flat surface vertically.
Take another strip, apply glue on the middle of the strip and attach it with the previous strip on its middle horizontally.
Take the 2 other thin strips and attach them with the previous strips diagonally, forming a criss -cross pattern.

Apply glue on the open end of any one of the strips and bring it towards the center.
Press the glued part on the center.
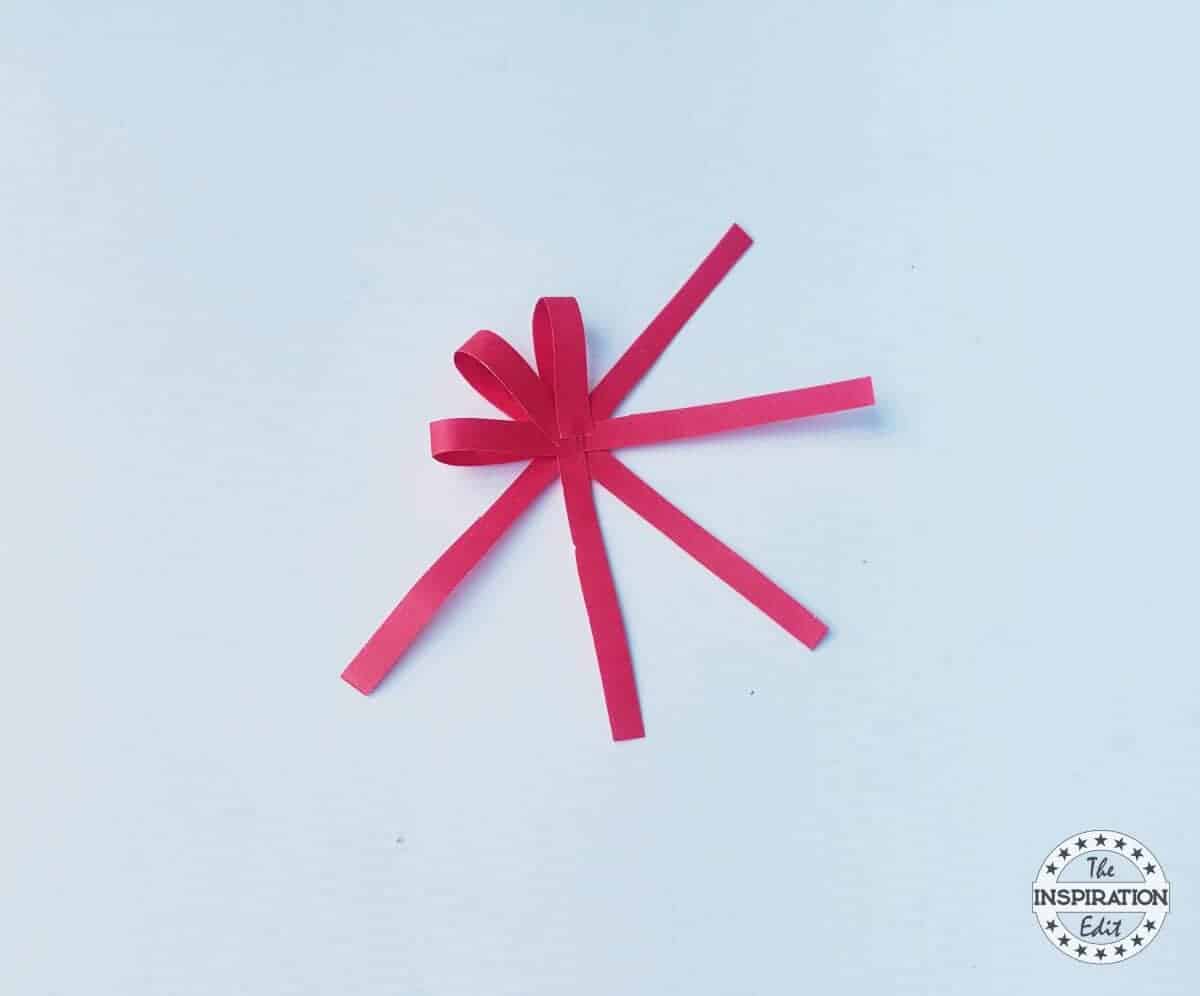
Similarly glue the rest of the open ends on the center of the pattern.

Take the spiral pattern and roll it from its outer edge.
Continue to roll towards the center and glue the rolled part on the center.
Glue the leaf cut out on the last strip (stem). All patterns ready? Great!
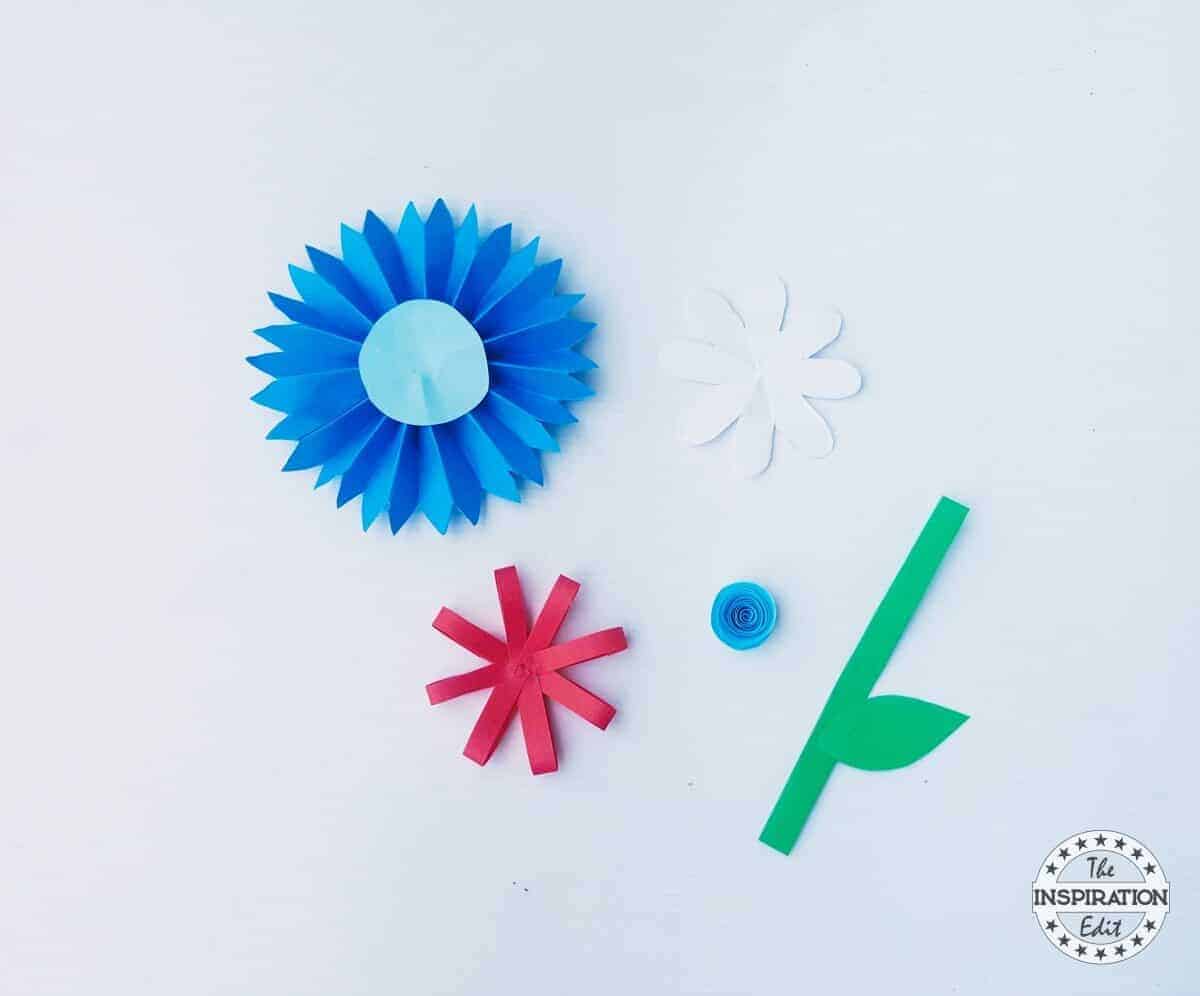
Glue the flat flower pattern with 8 petals on the accordion folded piece.
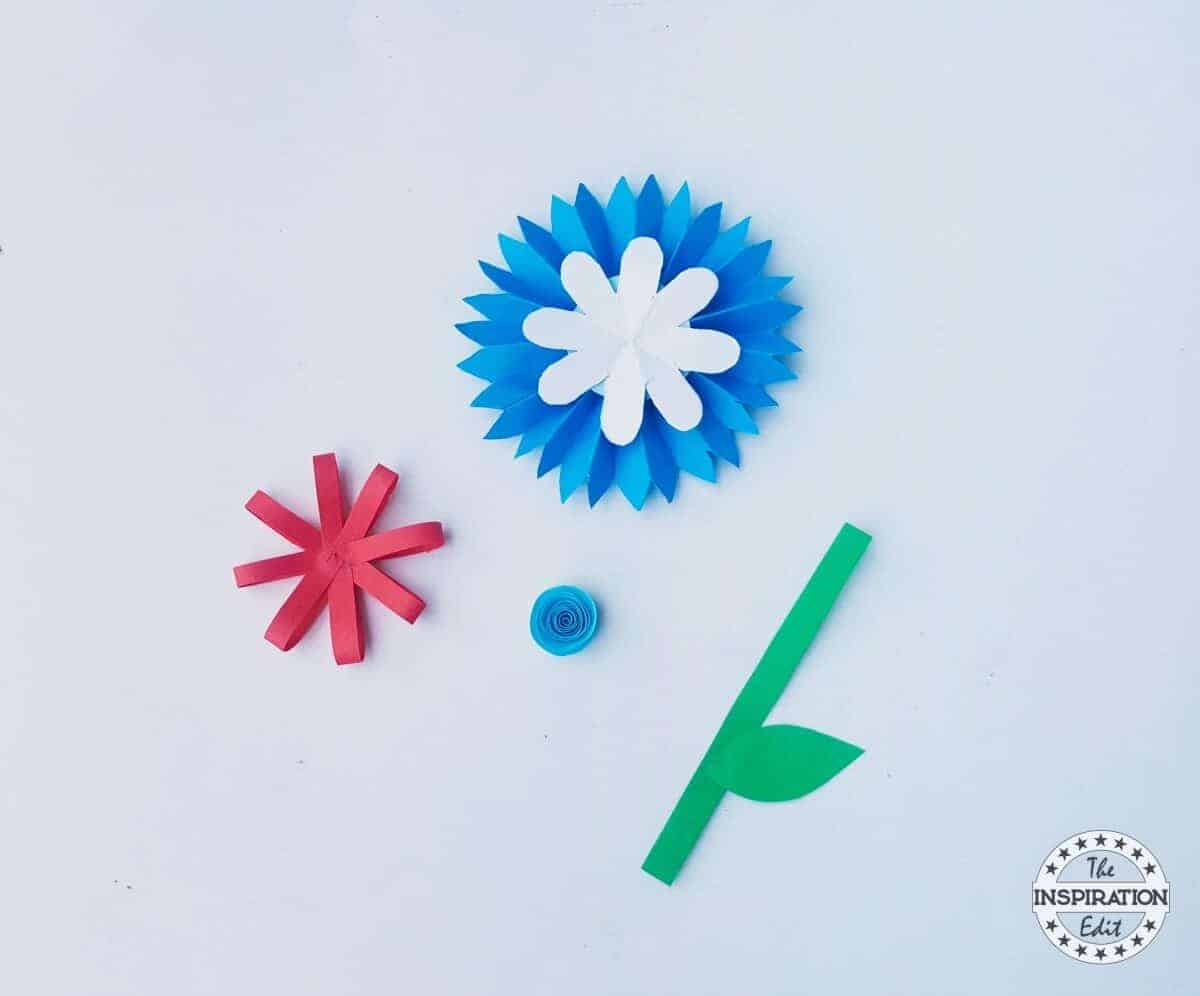
Now glue the pattern prepared in step 8 on the top of the flat flower.

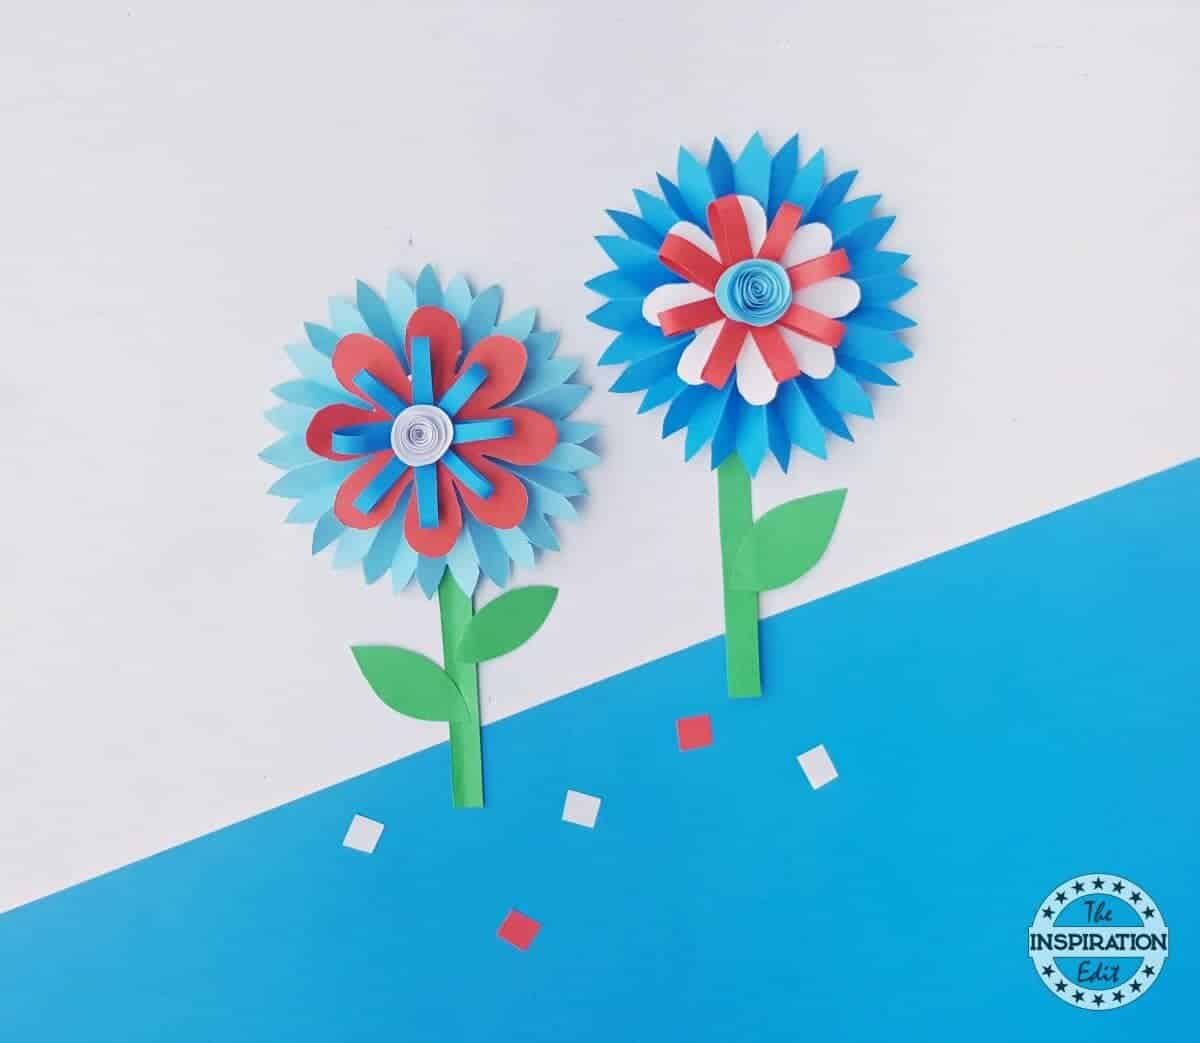
Glue the rolled pattern on the center of the last pattern.
Finally attach the flower pattern on the top end of the stem with the leaf attached to it.
Enjoy! Download Your Free Template Here!

Related Products
The Exquisite Book of Paper Flowers: A Guide to Making Unbelievably Realistic Paper BloomsPaper Flower Crafts (2nd Edition): 68 Paper Flowers You Can Use For Decorations, Card Accents, Scrapbooking, & Much More!Paper to Petal: 75 Whimsical Paper Flowers to Craft by Hand


4th July Paper Flower Craft

This is a tutorial on how to make a 4th July paper flower craft.
Materials
- Craft Glue
- Coloured Craft Papers
Tools
- Scissors
Instructions
Prepare the patterns from the given template. Select different shades of red and blue coloured craft papers.
Trace the template patterns on the selected papers, you may also use white paper. Cut out the traced patterns.
Take the strip with zigzag edge and start creating accordion folds along the length of the strip.
The zigzag edge can guide in creating neat and even accordion folds.
Keep folding the strip until reaching the other end of the strip.
Apply a small amount of glue on any one folds of either open ends if the strip.
Join the glued end of the strip with the other end of it to form an accordion folded ring.
Hold and gather the straight part of the folded strip; press it towards the center to flatten it.
Cut out 2 small pieces of paper and apply glue on them.
Place a glued paper on the center of the flattened accordion folded piece.
Similarly attach the other glued paper on the other side of it.
Now take the 4 thin strips and place any one of them on a flat surface vertically.
Take another strip, apply glue on the middle of the strip and attach it with the previous strip on its middle horizontally.
Take the 2 other thin strips and attach them with the previous strips diagonally, forming a criss -cross pattern.
Apply glue on the open end of any one of the strips and bring it towards the center.
Press the glued part on the center.
Similarly glue the rest of the open ends on the center of the pattern.
Take the spiral pattern and roll it from its outer edge.
Continue to roll towards the center and glue the rolled part on the center.
Glue the leaf cut out on the last strip (stem). All patterns ready? Great!
Glue the flat flower pattern with 8 petals on the accordion folded piece.
Now glue the pattern prepared in step 8 on the top of the flat flower.
Glue the rolled pattern on the center of the last pattern.
Finally attach the flower pattern on the top end of the stem with the leaf attached to it.
Enjoy!
MORE CRAFTS YOU MIGHT LIKE:
FANTASTIC PAPER WEAVE SEAHORSE CRAFT
BABY NARWHAL PLUSH PATTERN FOR KIDS TO SEW
WATERMELON CRAFT IDEAS FOR KIDS

Angela Milnes is a Qualified Early Years Teacher who has specialised in Preschool and Kindergarten teaching. She has a wealth of experience teaching young children and is passionate about kids crafts and having fun as a family. Angela has also taught cooking skills and loves to share both family recipes and easy crafts here on The Inspiration Edit. Follow her on Pinterest!


